The Cool Timelines plugin allows you to create a beautiful vertical timeline that you can add to a page or post. Timelines is ideal for situations where you want students to create a representation of a historical event or development process in chronological order.
After activating the Cool Timelines plugin in Plugins > All, you will see a new Timelines Stories menu item added to your main navigation.
How you create and add a timeline depends on if you are using the block editor or the classic editor.
The block editor has:
- Cool Timeline Shortcode block: for inserting a timeline created using TimeLine Stories into the post/page.
- Cool Timeline – Instant Builder block: for creating a timeline directly in the post/page in real time using the block and the block settings.
Add Stories
Your timeline can be created using a series of Timeline Stories. Each timeline story adds an event to your timeline.
The alternative if you are using the block editor is to create the timeline in real time within the post/page using using the Cool Timeline – Instant Builder block and it’s block settings.
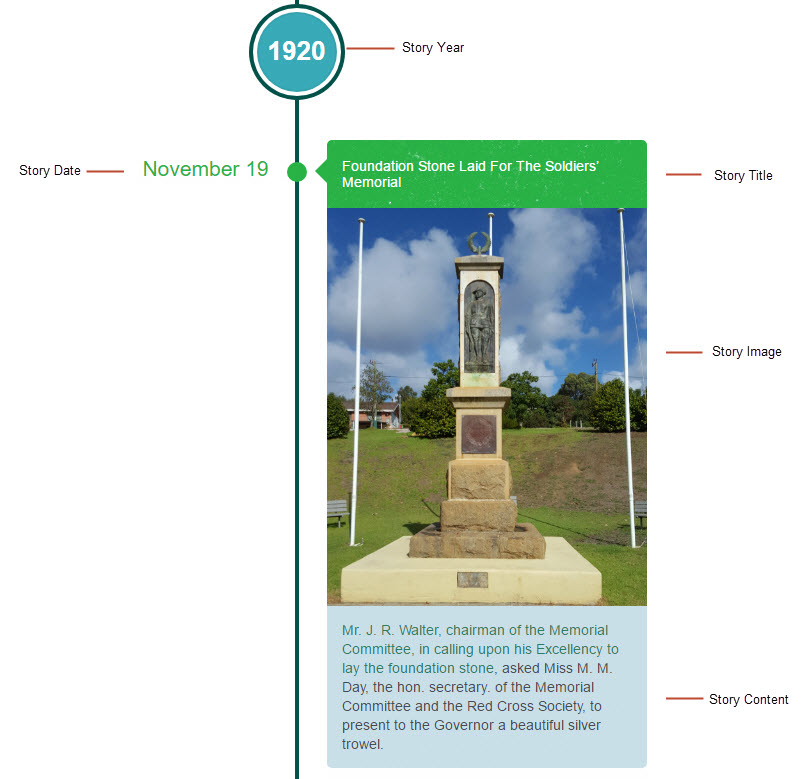
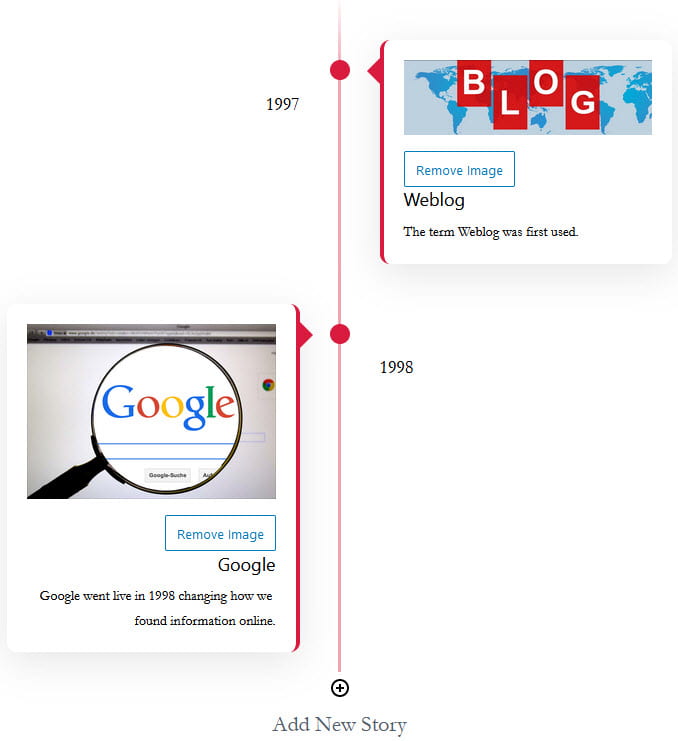
Below is what a story looks like in a timeline.
You add a timeline story as follows:
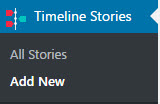
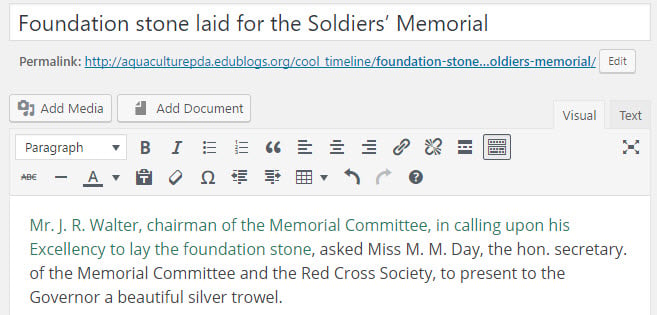
1. Go to Timelines Stories > Add New
2. Add your story title and your story content.
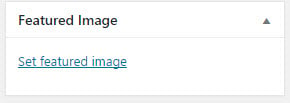
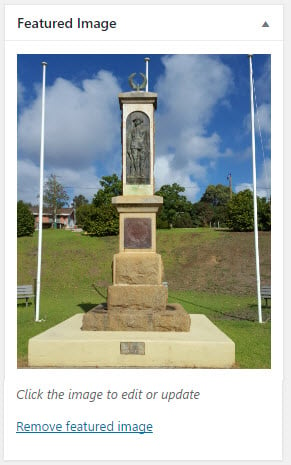
3. Click on Set featured image and add an image (used for your story image).
Your image is displayed in the Featured Image module once it has been set.
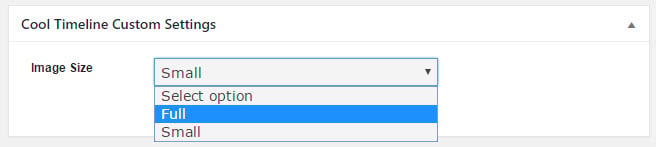
The image size can be switched between full or small sized using the custom timeline setting module underneath the timeline story editor.
By default, the full size image is used. Text is wrapped around the image when small is selected.
4. Optional – Click on Add Icon and set an icon if you want display a different icon for each story.
5. Click on Edit next to Publish immediately.
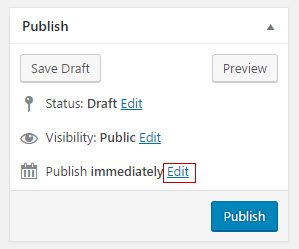
6. Change the publish date to your story date and story year then click OK.
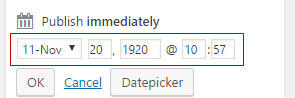
7. Click Publish.
8. You repeat the process of adding new stories using Timelines Stories > Add New until you’ve published a story for every event you want to display in your timeline.
Please note:
- A timeline story looks like a post if you click View Post after you’ve published your story.
- Your timeline stories displays in the timeline format when you embed the timeline shortcode into a post or page.
Display Timeline
How you add your timeline created using timeline stories depends on if you are using the block editor or the classic editor.
Block Editor
The following section explains how to add a timeline created using timeline stories using the block editor. If you are using the classic editor, refer to a timeline created using timeline stories using classic editor section.
Cool Timeline Shortcode block
After creating all your stories you display your timeline in a page or post using the block editor as follows:
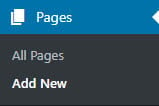
1. Go to Pages > Add New (or Posts > Add New).
2. Add your page title.
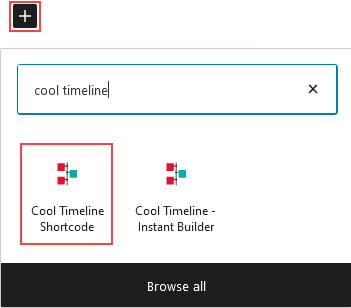
3. Add a Cool Timeline Shortcode block.
To add a Cool Timeline Shortcode block to a post or page you click on the + icon at the left of any empty block or at the top left of the editor then search for Cool Timeline and click on the Cool Timeline Shortcode block icon.
4. You can customize the timeline using the editor sidebar.
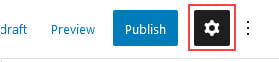
If you don’t see the editor sidebar, click on the cog next to Publish/Update button.
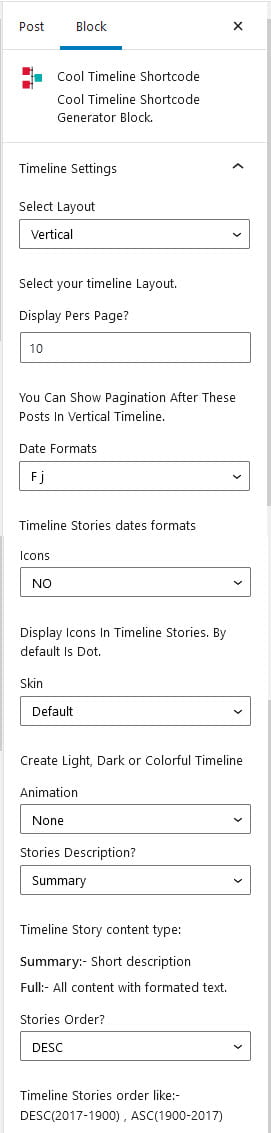
Options include:
- Layout – controls how your timeline is displayed.
- Default layout – vertical both sides timeline.
- Horizontal
- One Sided layout
- Simple layout
- Compact layout
- Displays per Page: controls how many stories are displayed in the timeline. If the number of stories is more than the number you’ve selected pagination will be added to your timeline.
- Date format: controls how the date is formatted.
- Icon – Select Yes is you have set story icons and want them displayed.
- Skin – controls the appearance of the skin.
- Default skin
- Clean
- Animation effect – controls the timeline animation.
- None – no animation
- FadeInUp
- Story description
- Summary
- Full Text
- Story Order
- Desc
- Asc
5. Click Publish.
6. When you view your published page (or post) you will see your timeline.
Cool Timeline – Instant Builder block
Cool Timeline includes an Instant Builder block which can be used for creating a timeline directly in the post/page in real time using the block and the block settings as follows.
1. Go to Pages > Add New (or Posts > Add New).
2. Add your page title.
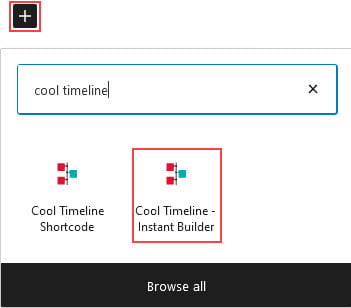
3. Add a Cool Timeline – Instant Builder block.
To add a Cool Timeline – Instant Builder block to a post or page you click on the + icon at the left of any empty block or at the top left of the editor then search for Cool Timeline and click on the Cool Timeline – Instant Builder block icon.
Here’s what the Cool Timeline – Instant Builder block looks like:
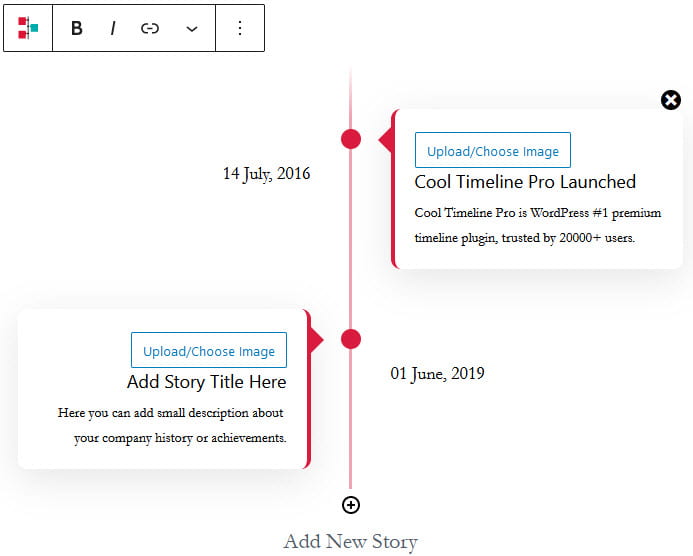
4. Edit the dates, upload/choose own images, add story titles, story descriptions, add new stories directly inside the Cool Timeline – Instant Builder block to create your own timeline.
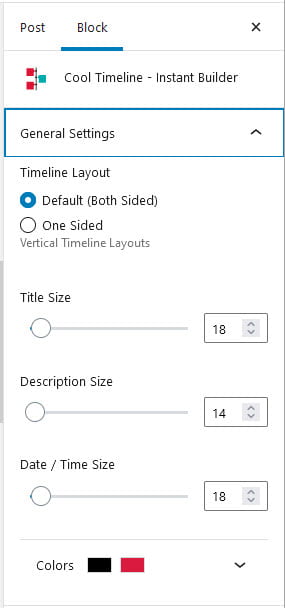
5. You can customize the timeline using the editor sidebar.
If you don’t see the editor sidebar, click on the cog next to Publish/Update button.
Options include:
- Timeline layout
- Default – both sides
- One Sided
- Title Size
- Description size
- Date / Time Size
- Colors
6. Click Publish.
7. When you view your published page (or post) you will see your timeline.
Classic Editor
The following section explains how to add a timeline created using timeline stories using the classic editor. If you are using the block editor, refer to a timeline created using timeline stories using block editor section.
After creating all your stories you display your timeline in a page or post using the classic editor as follows:
1. Go to Pages > Add New (or Posts > Add New).
2. Add your page title.
3. Click on the Add Cool Timeline Shortcode icon.

4. The Cool Timelines Shortcode window will launch.
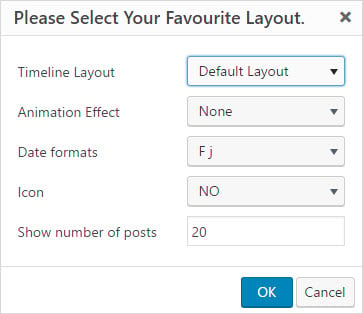
5. Select your layout options and then click OK.
Options include:
- Timeline layout – controls how your timeline is displayed.
- Default layout – vertical both sides timeline.
- One Sided layout – vertical one side timeline.
- Animation effect – controls the timeline animation.
- None – no animation
- FadeInUp
- Date format: controls how the date is formatted.
- Icon – Select Yes is you have set story icons and want them displayed.
- Show number of posts: controls how many stories are displayed in the timeline. If the number of stories is more than the number you’ve selected pagination will be added to your timeline.
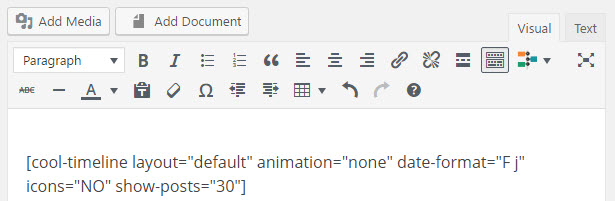
6. Your timeline shortcode will be inserted into the page.
7. Click Publish.
8. When you view your published page (or post) you will see your timeline.
Timeline Settings
Your timeline can be customized using the options in Settings > Cool Timeline Settings.
There are three timeline settings pages:
- General Settings
- Style Settings
- Typography Settings
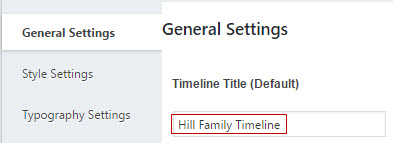
General Settings
The general settings is where you configure the broad settings of your timeline including the timeline title, heading style, title alignment, timeline image, how the story is displayed and story order.
You can change these settings at any time by going to Settings > Cool Timelines > General Settings, make your desired changes and then click Save Changes.
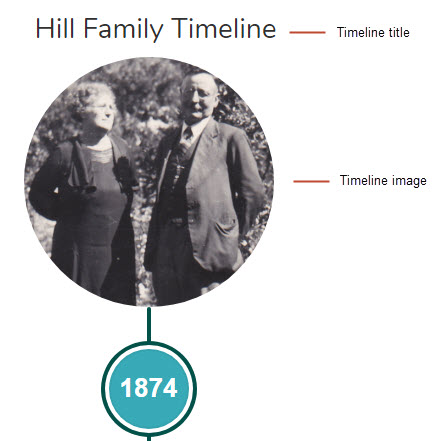
Timeline title
The timeline title is displayed at the top of your timeline. By default, your timeline title is Cool Timelines. It can be replaced with any title.
Title Heading Tag and Title Alignment
Controls the heading style of the Timeline title and the alignment of the timeline title.

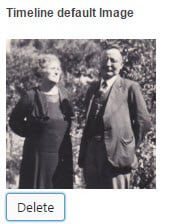
Timeline default image
The timeline default image allows you to add an image to the top of your timeline.
Number of stories to display
Controls how many stories are displayed in the timeline. If the number of stories is more than the number you’ve selected pagination will be added to your timeline. This can be adjusted when you insert a timeline into a page using the Cool Timeline Shortcode.
Content Length
Controls the length of the story excerpt displayed in the timeline if you use the short (default) stories description. To display the full story you select Full (with HTML).
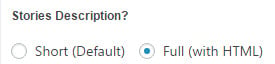
Stories Description
Allows you to switch between displaying excerpt of your stories and displaying the full story. By default, an excerpt of the stories is displayed and readers see a Read More link if your story is longer than the content length set.
Change to Full (with HTML) if you want the full stories displayed in the title.
Read More
Leave as Yes for Read more if you have Short Default selected in stories description.
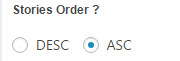
Stories Order
By default, stories are displayed in DESC which is reverse chronological order. Change it to ASC if you want to display your timeline in chronological order.
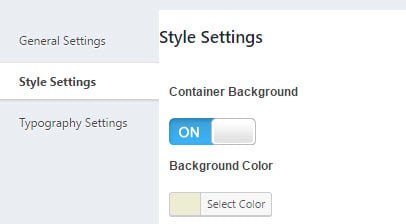
Style Settings
Style settings is used to control the colors used in your timeline.
You can change these settings at any time by going to Settings > Cool Timelines > Style Settings, make your desired changes and then click Save Changes.
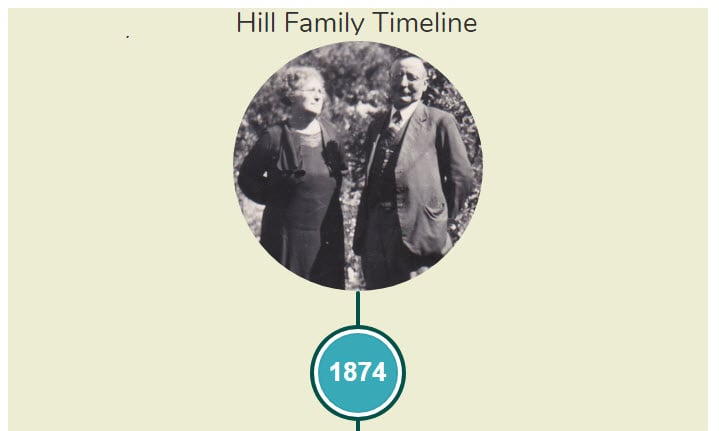
Container background
The container background is what appears behind your timeline. By default, it is set to No for container background and will use the background color of the page/post content area.
For example, if configured to a background color of light yellow
Your timeline would look like this:
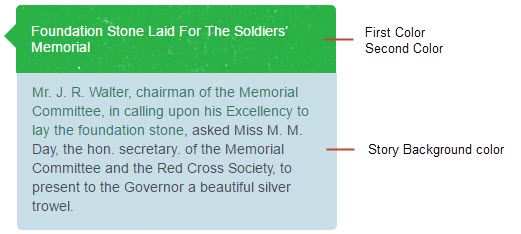
Story Background color, First color and Second color
The story background controls the color of each story container while the first color and second color controls the color of the story titles in the timeline.
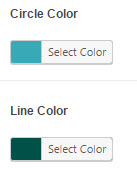
Line Color and Circle color
Allows you to adjust the color of the line and the year circle color in the timeline.
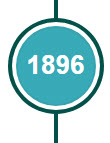
For example, when set to the following color options:
It looks like this:
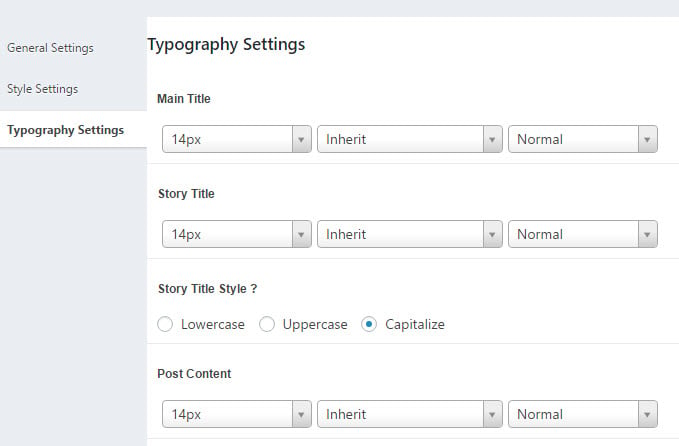
Typography Settings
The typography settings enables you to adjust the typography in your timeline.
You can change these settings at any time by going to Settings > Cool Timelines > Typography Settings, make your desired changes and then click Save Changes.