After uploading an image you are given the option to edit some of the settings.
You can edit these settings for images directly in your media library or in your post/page editor.
In Media Library
All media files, such as images, video, audio and documents, that you’ve ever uploaded to posts or pages are listed in your media library.
The media library is where you can manage all existing media files or upload new files (Media > Add New) directly to your site without having to start a new post or page.
To change the settings on images in your media library you go to Media > Library.
By default, the Media library displays files in a Grid View.
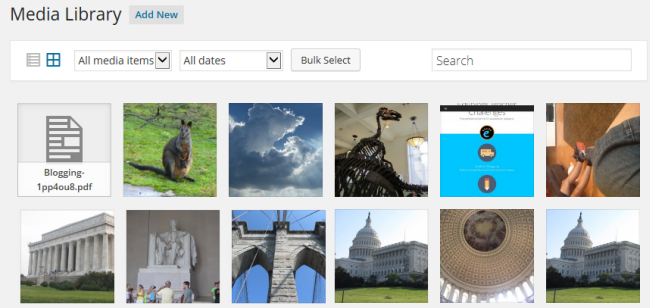
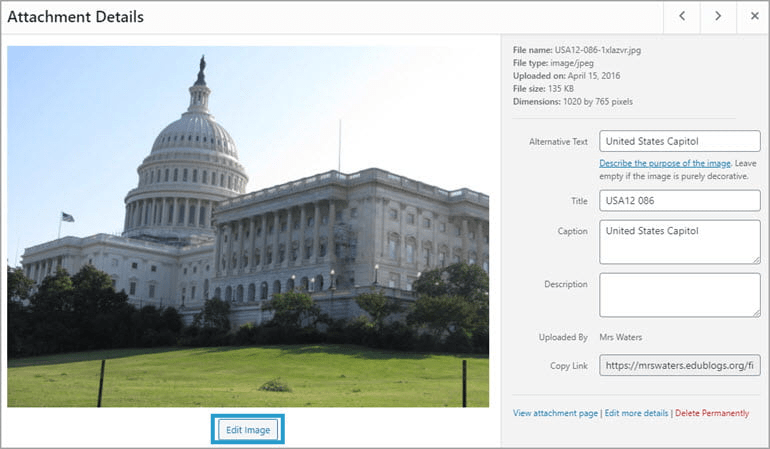
Clicking on a file in Grid View mode launches the file’s attachment details window where you can Edit Image, View Attachment page and Delete Permanently.

Below is what the file’s attachment details window looks like.
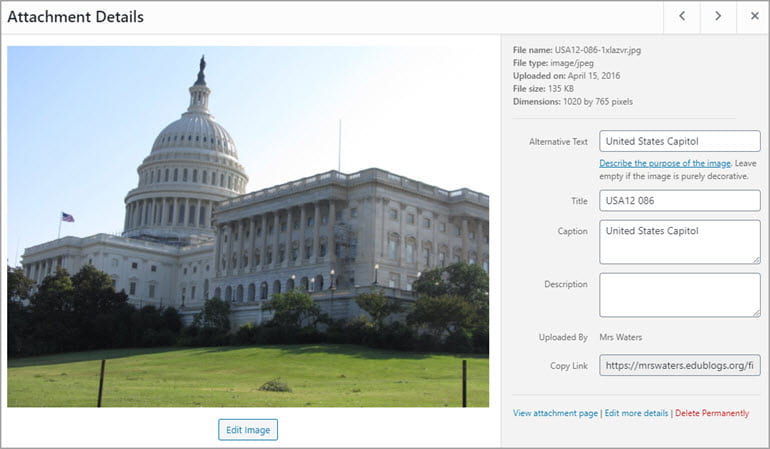
The following image settings can be changed:
- Title – Image title to be displayed when the image attachment page is viewed.
- Alternative text – displayed when images don’t load.
- Caption – displayed when a caption is added.
- Description – information you want displayed when an image is viewed on it’s attachment page.
The following image settings can’t be changed:
- File name – name of your file. If you want this changed you need to rename the file on your computer before uploading.
- File type – Automatically displayed based on the file type you uploaded.
- Upload date – date the image was uploaded.
- Dimensions – width and height of the original image.
Edit Image
To edit the image click on Edit Image.
The screen will load and look like the following:
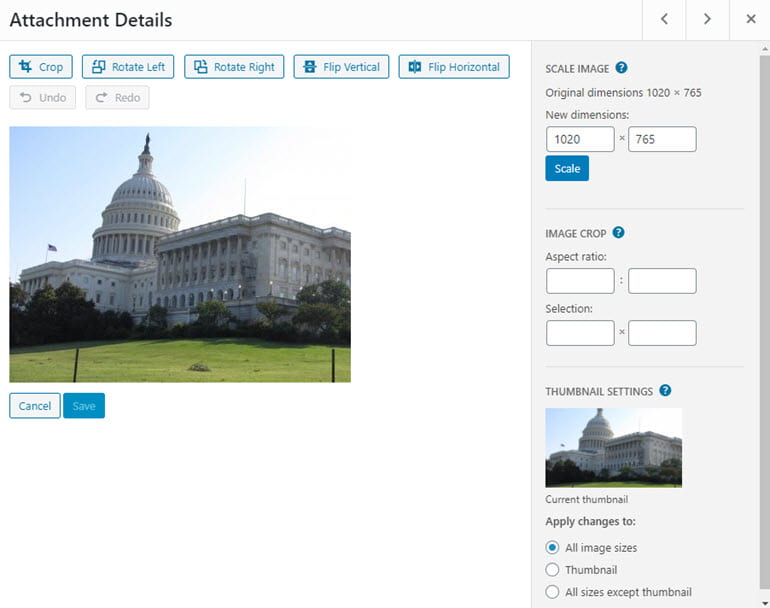
Your editing options are: crop, rotate, flip and resize.
Crop
Cropping is used to remove unwanted portions of an image that you have uploaded.
Click and frag with your mouse to select the area of the image you want to keep and then click on the Crop button once you are happy with your selection.

This displays your new image.
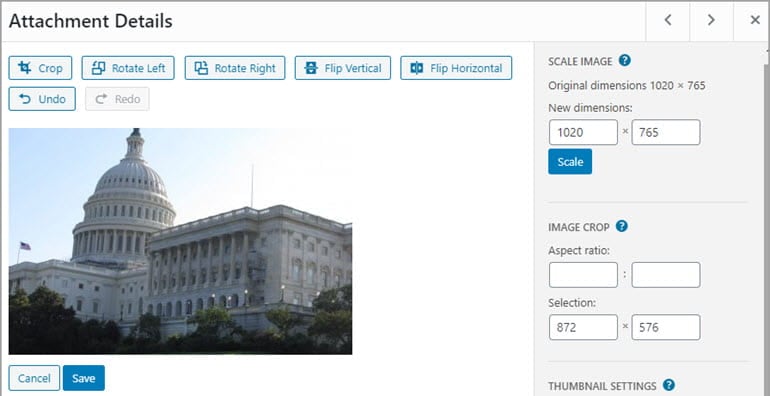
Click Save if you are happy with the cropped image or Cancel to try again. Once you’ve finished you must click Save on the cropped image to save the new image.
Rotate
The Rotate Left and Rotate Right are used to rotate the image clockwise or counter-clockwise.
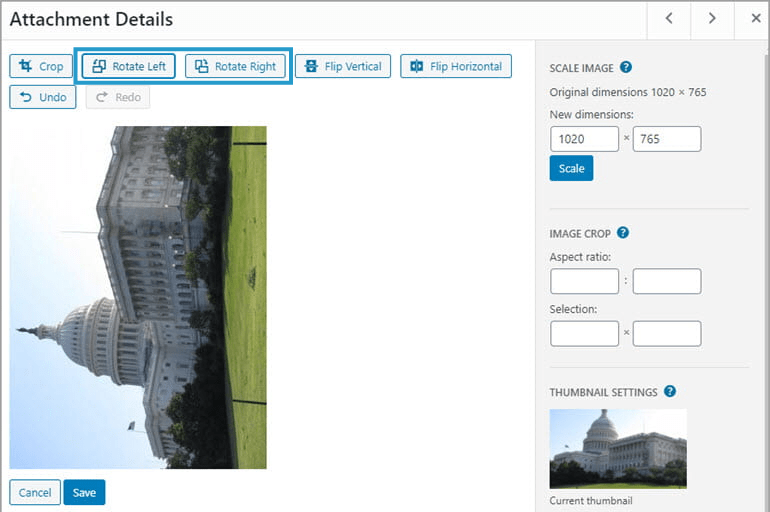
Click Save if you are happy with the rotated image or Cancel to try again.
Flip
The image can be flipped vertically or horizontally.
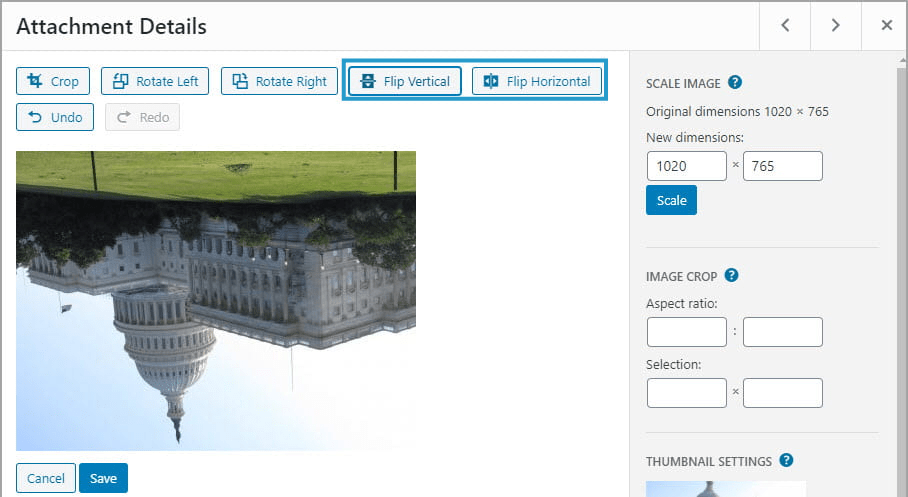
Click Save if you are happy with the flipped image or Cancel to try again.
Resize
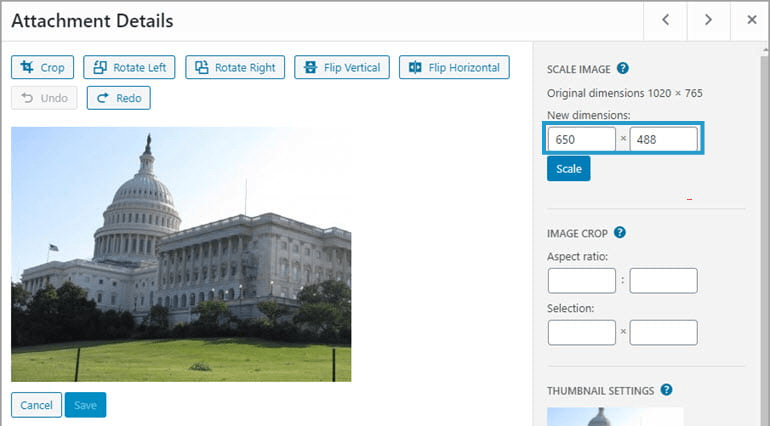
Scale image is used to resize the image to a smaller size.
Add the new width (first field) and the height field (second field) adjust automatically and proportionally. Click Scale to save your resized image.
Undo and Redo
Undo and Redo icons are used to undo or redo edits you made to an image.

Restore
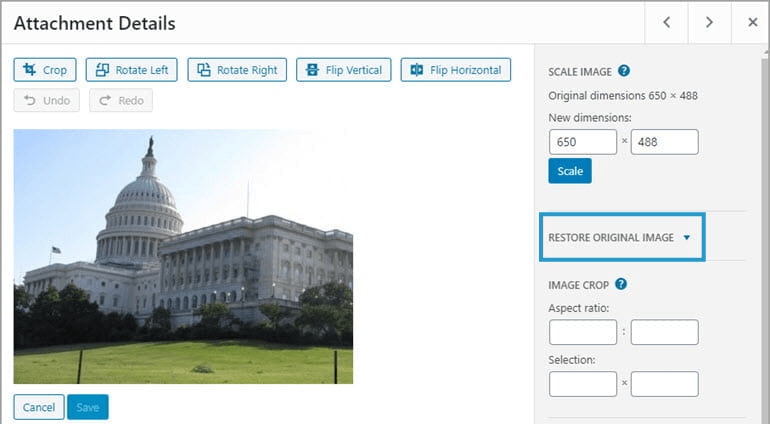
Restore original image is used to revert all previous edits made to an image and restore the original image uploaded to the media library.
First click on Restore Original Image to reveal the restore option and then click on the Restore Image button.
In Editor
How you edit an image in a post or page depends on if you are using the block editor or the classic editor.
Block Editor
You can edit your image by clicking on the Crop icon in the toolbar of the image block when using the block editor.
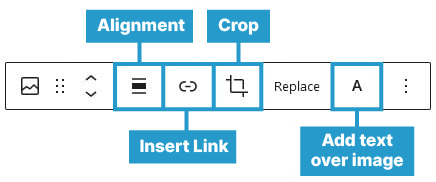
When you click on the Crop icon in the toolbar of the image block a selection of editing tools will appear which allows you to edit your image within the editor.

From left to right these tools are:
- Zoom: You can zoom in on your image up to 300% and click and drag to control which part of the image is zoomed in.
- Aspect Ratio: Control the ratio of an image’s width to its height.
- Original
- Square
- Landscape: 16:10, 16:9, 4:3, 3:2
- Portrait: 10:16, 9:16, 3:4, 2:3
- Rotate: Rotate your image by 90°, 180°, 270°, or 360°.
- Apply: Commit your changes to the image.
- Cancel: Exit the image editing tools, abandon changes.
Any edits made to the image creates a new copy of the image in your media library so it doesn’t affect the image if it is used in another location.
Classic Editor
You can edit an image using your classic editor as follows:
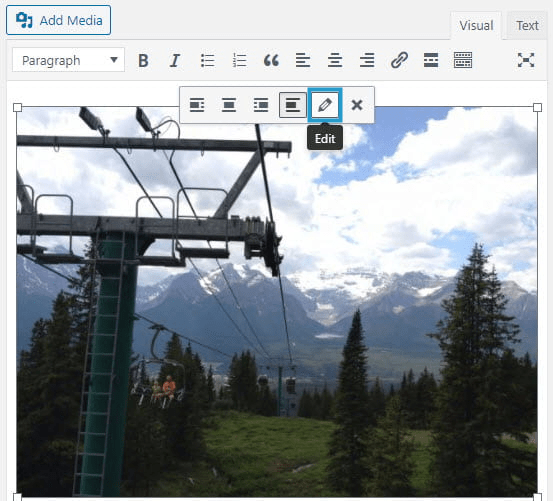
1. Click on the image and then click on the Edit icon (Pencil icon) that appears.
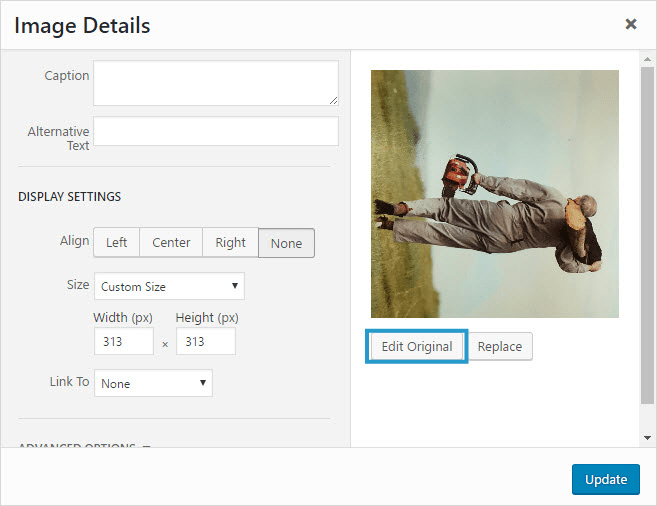
2. The Image Details window will appear.
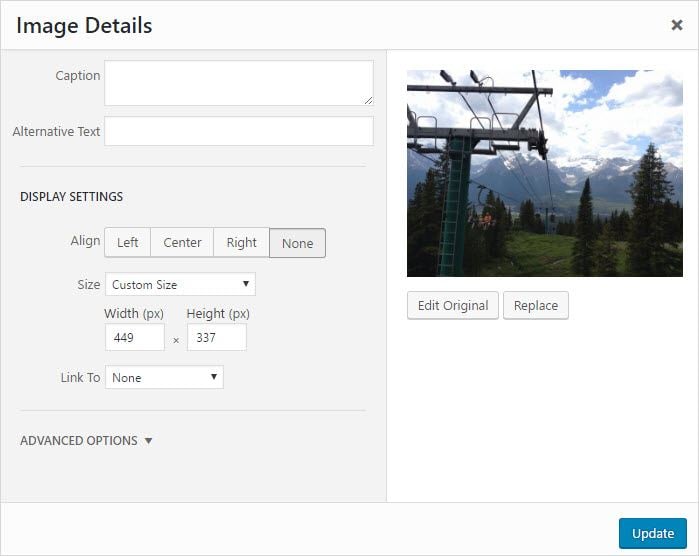
You can edit the following settings in the Image Details screen:
- Caption – displayed when a caption is added.
- Alternative text – displayed when images don’t load.
- Align – used to left, center, right or none align image.
- Size – used to change the size of the image. You can select from preset sizes or select the custom size and enter the width and height of the image. The preview area displays the effect of your resizing.
- Link URL – You can link the image to it’s image URL, link it to any URL (handy if you want to link an image to a website) or have no link URL (used if you don’t want readers to be redirected to another page when they click on an image).
At the bottom of the Image Details screen is an Advanced Options which, when clicked, displays this:
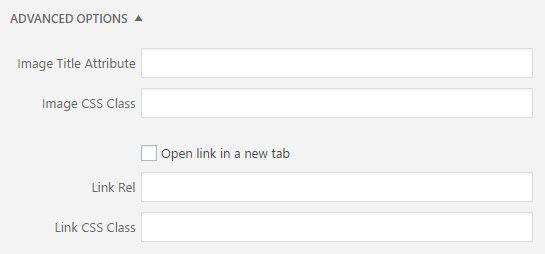
You can edit the following settings in the Advanced Options:
- Image Title Attribute – controls what will be displayed as a tooltip when a reader hovers over your image.
- Image CSS Class – lets you add a CSS classes to an image.
- Open link in a new tab – opens the image in a new browser tab.
- Link Rel – The link’s rel attribute, for adding nofollow amongst other things.
- Link CSS Class – lets you add CSS classes to the image link.
The Edit Original in the Image Details Window launches the Edit Image screen where you can flip, rotate, crop or scale the image.
