The easiest way to create and manage student blogs is to use My Class.
My Class is the ultimate tool for class and student blogging. It allows you to connect student blogs to your class blog where you can control the student blog privacy, comment moderation and post moderation on all student blogs with just one click.
Important tips:
- The instructions on this page are intended for teachers who want to create blogs for their students using My Class > Create Student blogs.
- Students can create their own blogs and join your class blog by referring to the Create own blog support documentation.
- My Class isn’t automatically enabled on Edublogs Campus blogs. Please contact Edublogs support if you would like to use My Class on a Campus blog.
Set up My Class
How is how you set up My Class for managing student blogs:
1. Go to My Class > Create a Class

2. Select “This is a class blog” (1), ”No – use if you want them to publish posts on their student blog” (2), choose if you want to moderate posts and comments on student blogs (3), your preferred privacy option (4) and which users you want to manage your student blogs (5).
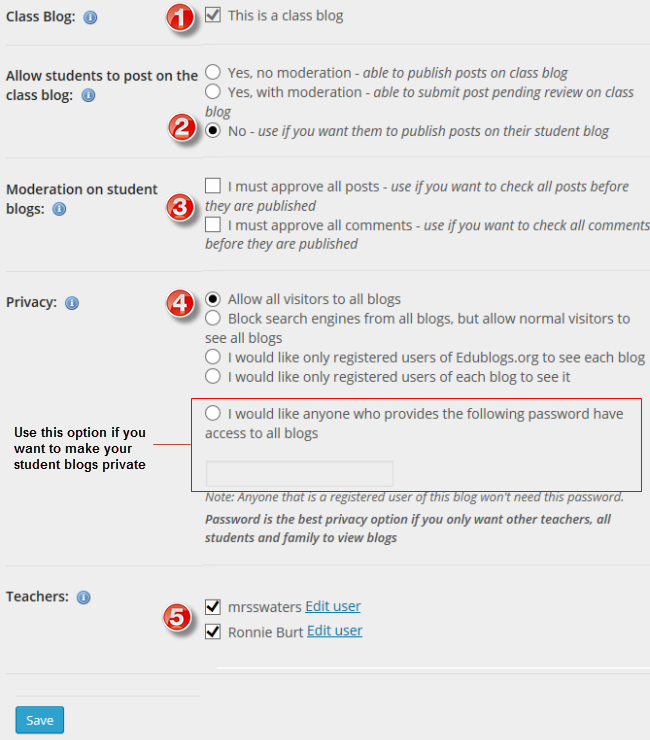
3. Click Save.
4. The My Class menu should change to show the following menu items.

Create Student blogs
1. Go to My Class > Create Student Blogs.
2. Add username, email address, password, blog URL and blog title.
- This creates their student blogs, adds them as a user to the class blog, adds you as a user to their student blog and connects their student blog with the class blog.
- You can create your student accounts with one email account if you don’t want students to use their own email account.
- Refer to these tips for choosing student usernames, blog URLs and blog titles.
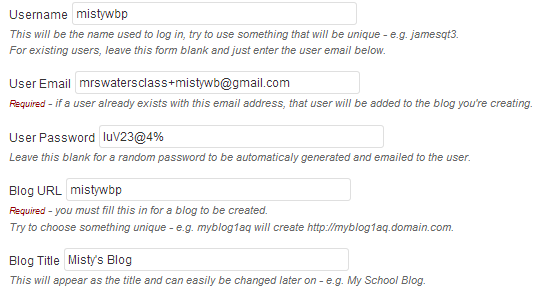
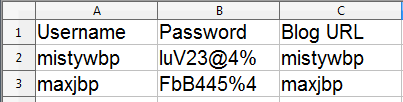
We recommend you use the preset password option and record their username/password/blog URL in a spreadsheet as you create their blogs. Some teacher require students to informed them when passwords are changed so they have a record of the student’s latest password.
This is handy for those students who forget password or provided the wrong email address.
3. Click Submit.
![]()
Additional information
When you set up My Class your student users are added as user to the class blog and to the student blog.
The menu items they see depends on which dashboard they are logged into and what settings you have set in My Class > Settings.
If you used the following My Class > Settings:
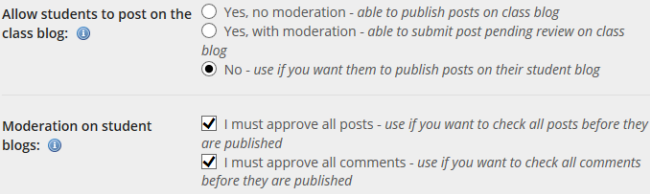
Menu items when logged in as a student user would look like the following:
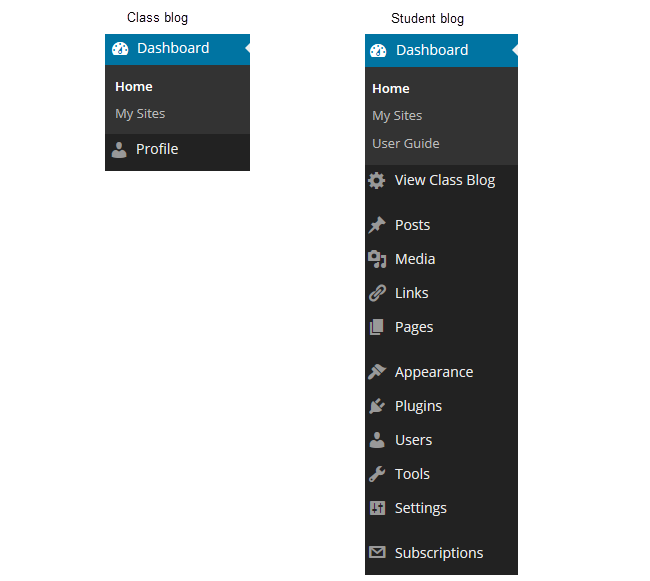
If your students see limited menu items it means they are logged into the Class blog dashboard and need to navigate to their student blog dashboard.
Changing blog dashboards is as simple as:
1. Go to My Sites dropdown menu in your admin bar.
2. Click on the dashboard of the blog you want to access.

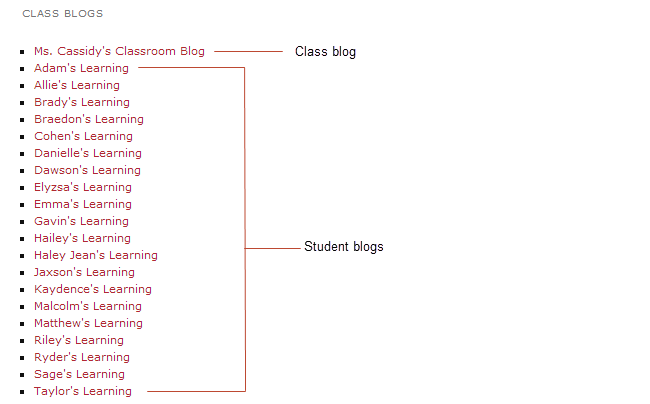
What is the easiest way for students to find their class mates’ blogs?
The easiest way for students to find each other’s blog is to add the class blog widget to the sidebar. The class blog widget provides a handy link to all student blogs attached to My Class. Students just need to click on the link to easily go to a class mates blog.
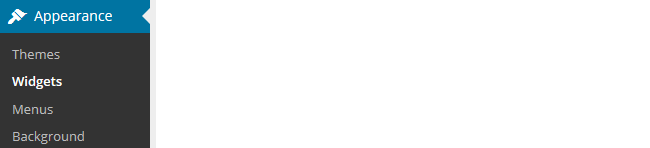
1. Go Appearance > Widgets.
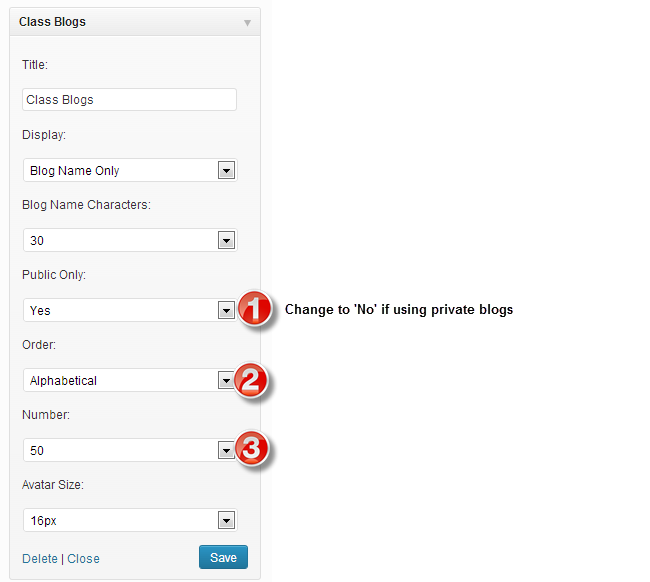
2. Add the class blog widget to the desired sidebar.
3. The widget will automatically open.
4. Select ’No’ under Public only if you are using private blogs (1), alphabetical (2), the number of blogs (3) and then click Save.
- Any time you add any more student blogs to My Class you update the Class blog list by opening up the Class blog widget and clicking Save.
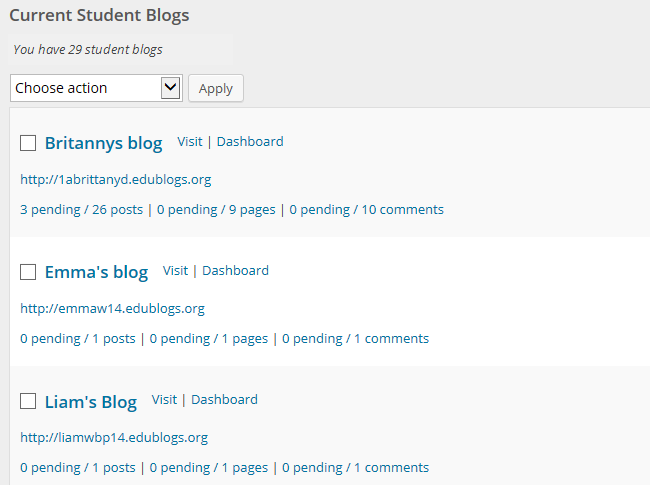
How do I check posts and comments on student blogs?
Student posts and comments can be checked using My Class > Student blogs, Dashboard > My Sites or Users > Reports.
My Class > Student blogs and Dashboard > My Sites is where you’ll see all your student blogs listed. Here is where you can use the Dashboard link to access their blog; where you’ll see the number of published and pending posts / pages / comments on their blogs.
Clicking on pending under a student blog takes you to the pending post or pending comments page inside their student blog dashboard. Where you can edit, approve or publish the post or comment.
Reports, via Users > Reports, allows you to run a report on a specific student. It allows you to check comments they’ve submitted on any blog or posts they have published and choose the date range you want to check.