Accessibility plugin
The accessibility plugin helps with a variety of common accessibility problems in WordPress themes. It adds a number of helpful accessibility features that can be enabled or disabled based on your theme’s needs. It can’t correct every problem and if you have strict accessibility requirements you should use one of our Accessibility ready themes.
Once you have activated the Accessibility plugin in Plugins > All, go to Settings > WP Accessibility to configure.
Force Alt Text
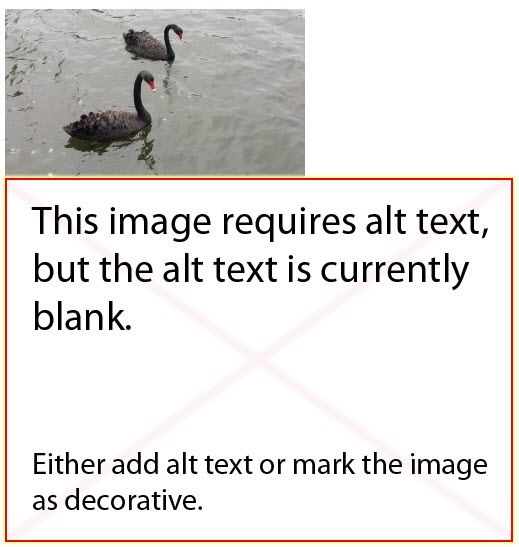
Adding Alt text (alternative text) to images is important for screen reader users as they can’t view images on the page and the alt text is used by the screen reader to describe the images to them. The accessibility plugin automatically forces you to add Alt Text to all images added to your site and can’t be disabled.
You add the Alt Text to the Attachment Details panel when you upload an image before you click Insert into Post.

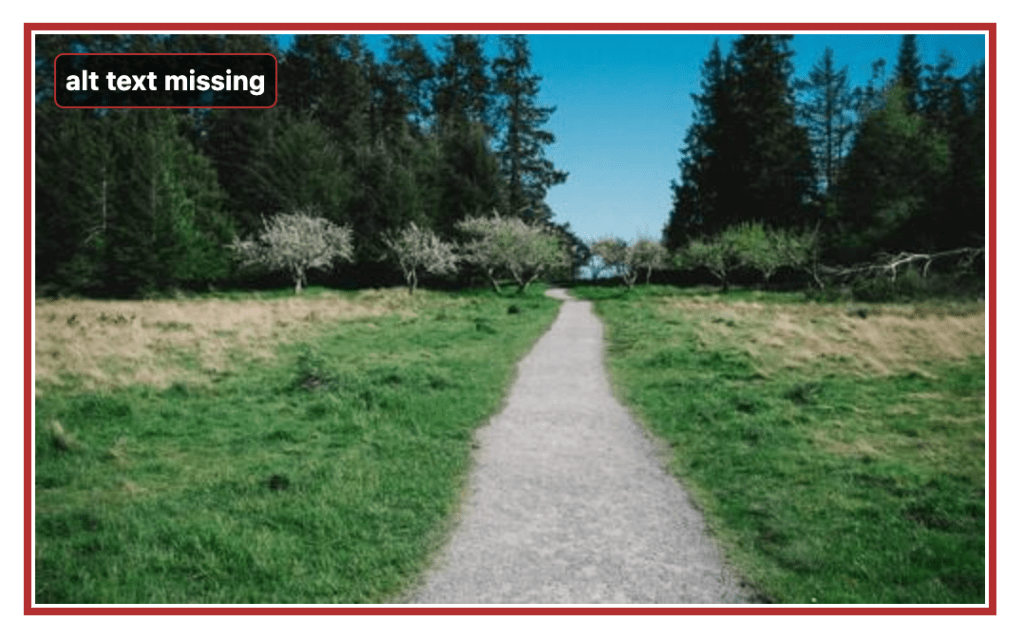
If the Alt Text is missing, or the same of the Title, you’ll see a warning when the image is inserted into the post.
Adding Alt Text using Block Editor
If you are using the Block editor you would need to add the Alt text to the right sidebar under “Alternative Text”
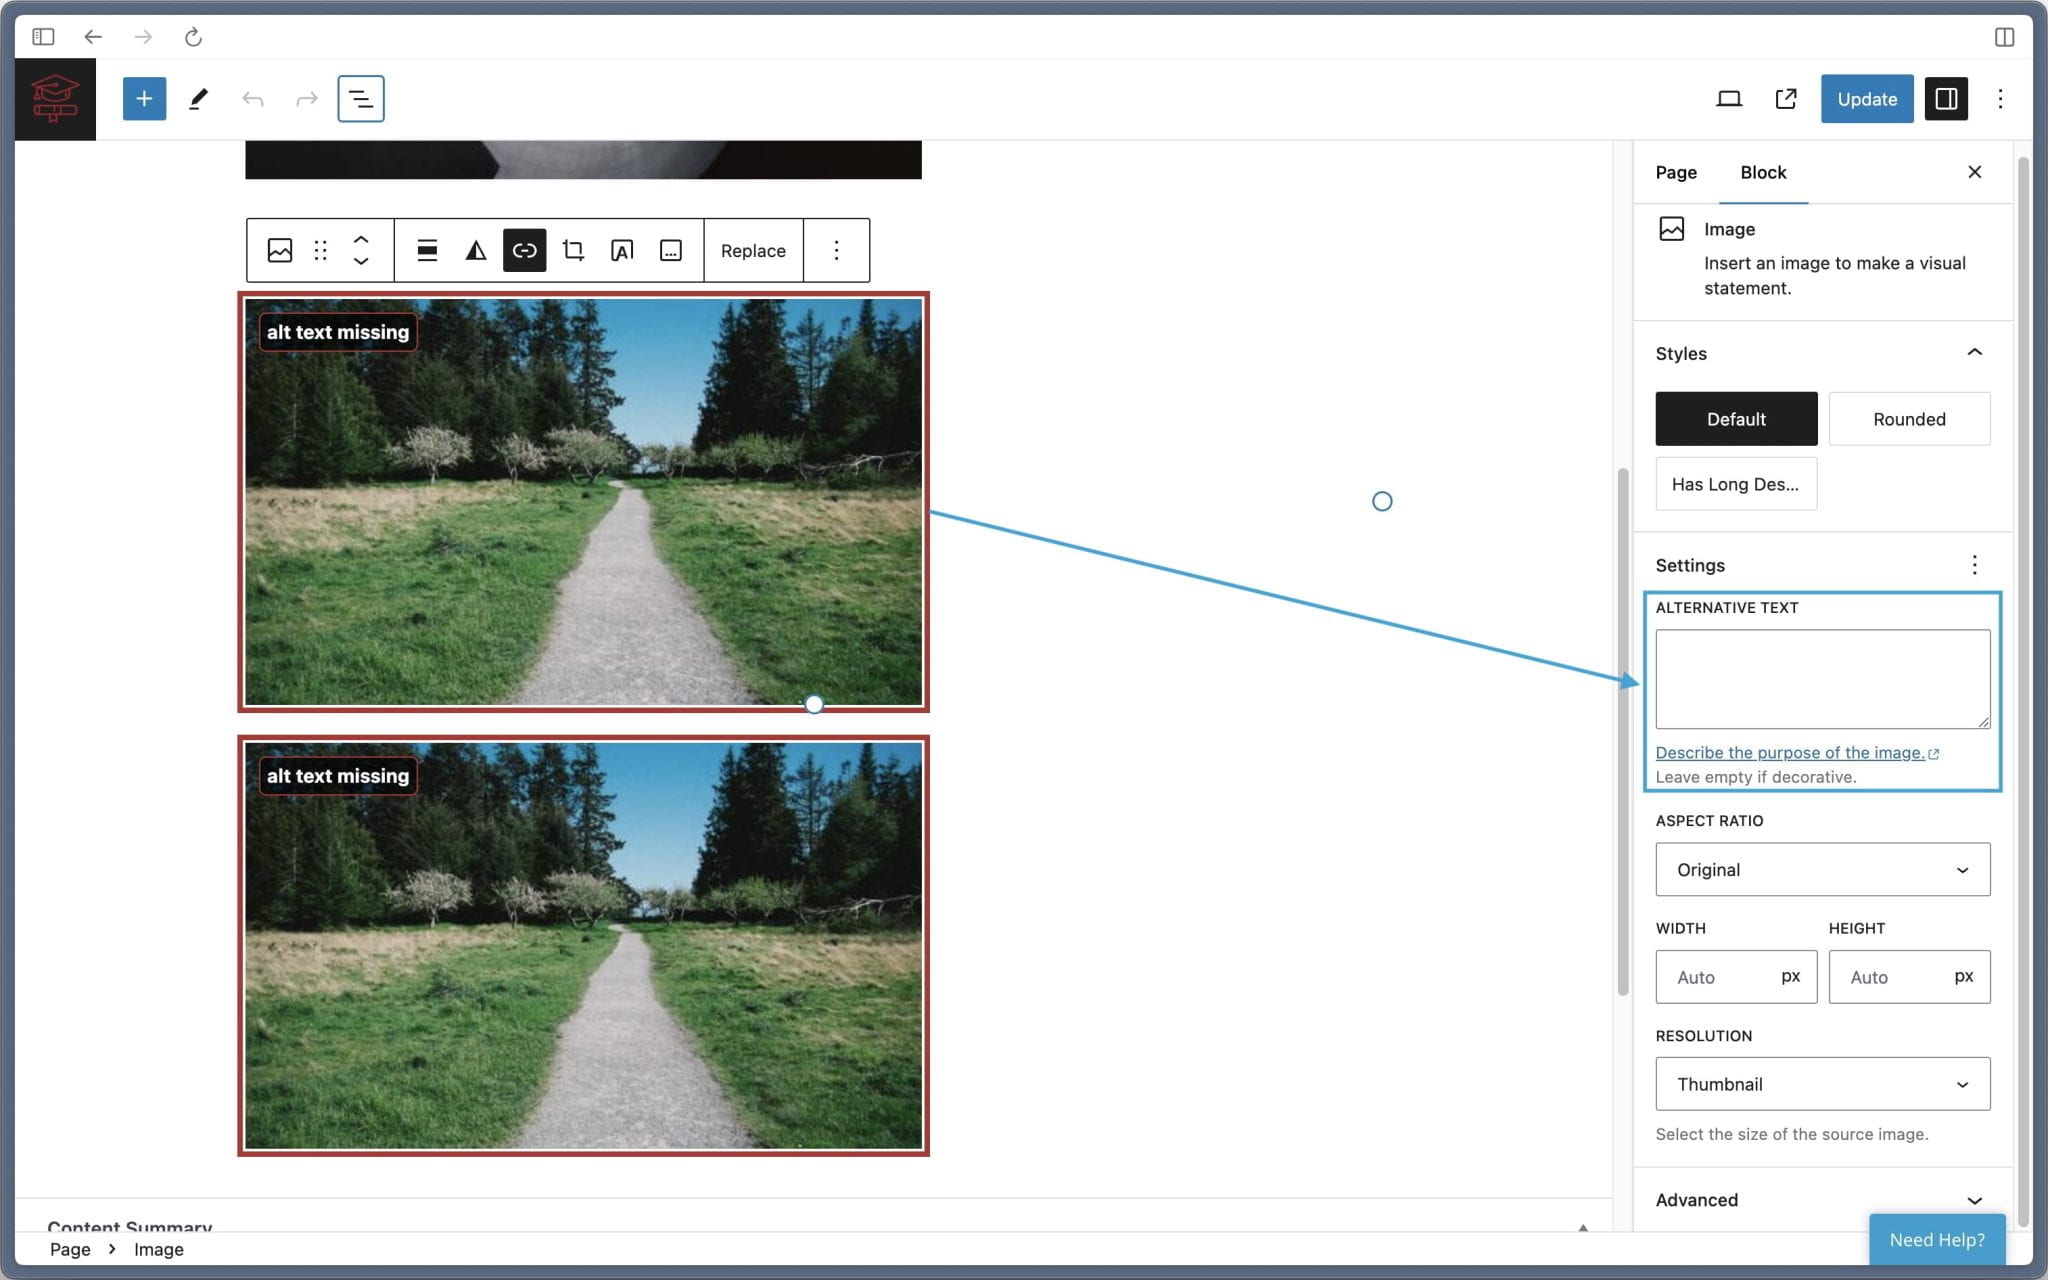
If the Alt Text is missing, or the same of the Title, you’ll see a warning when the image is inserted into the post.
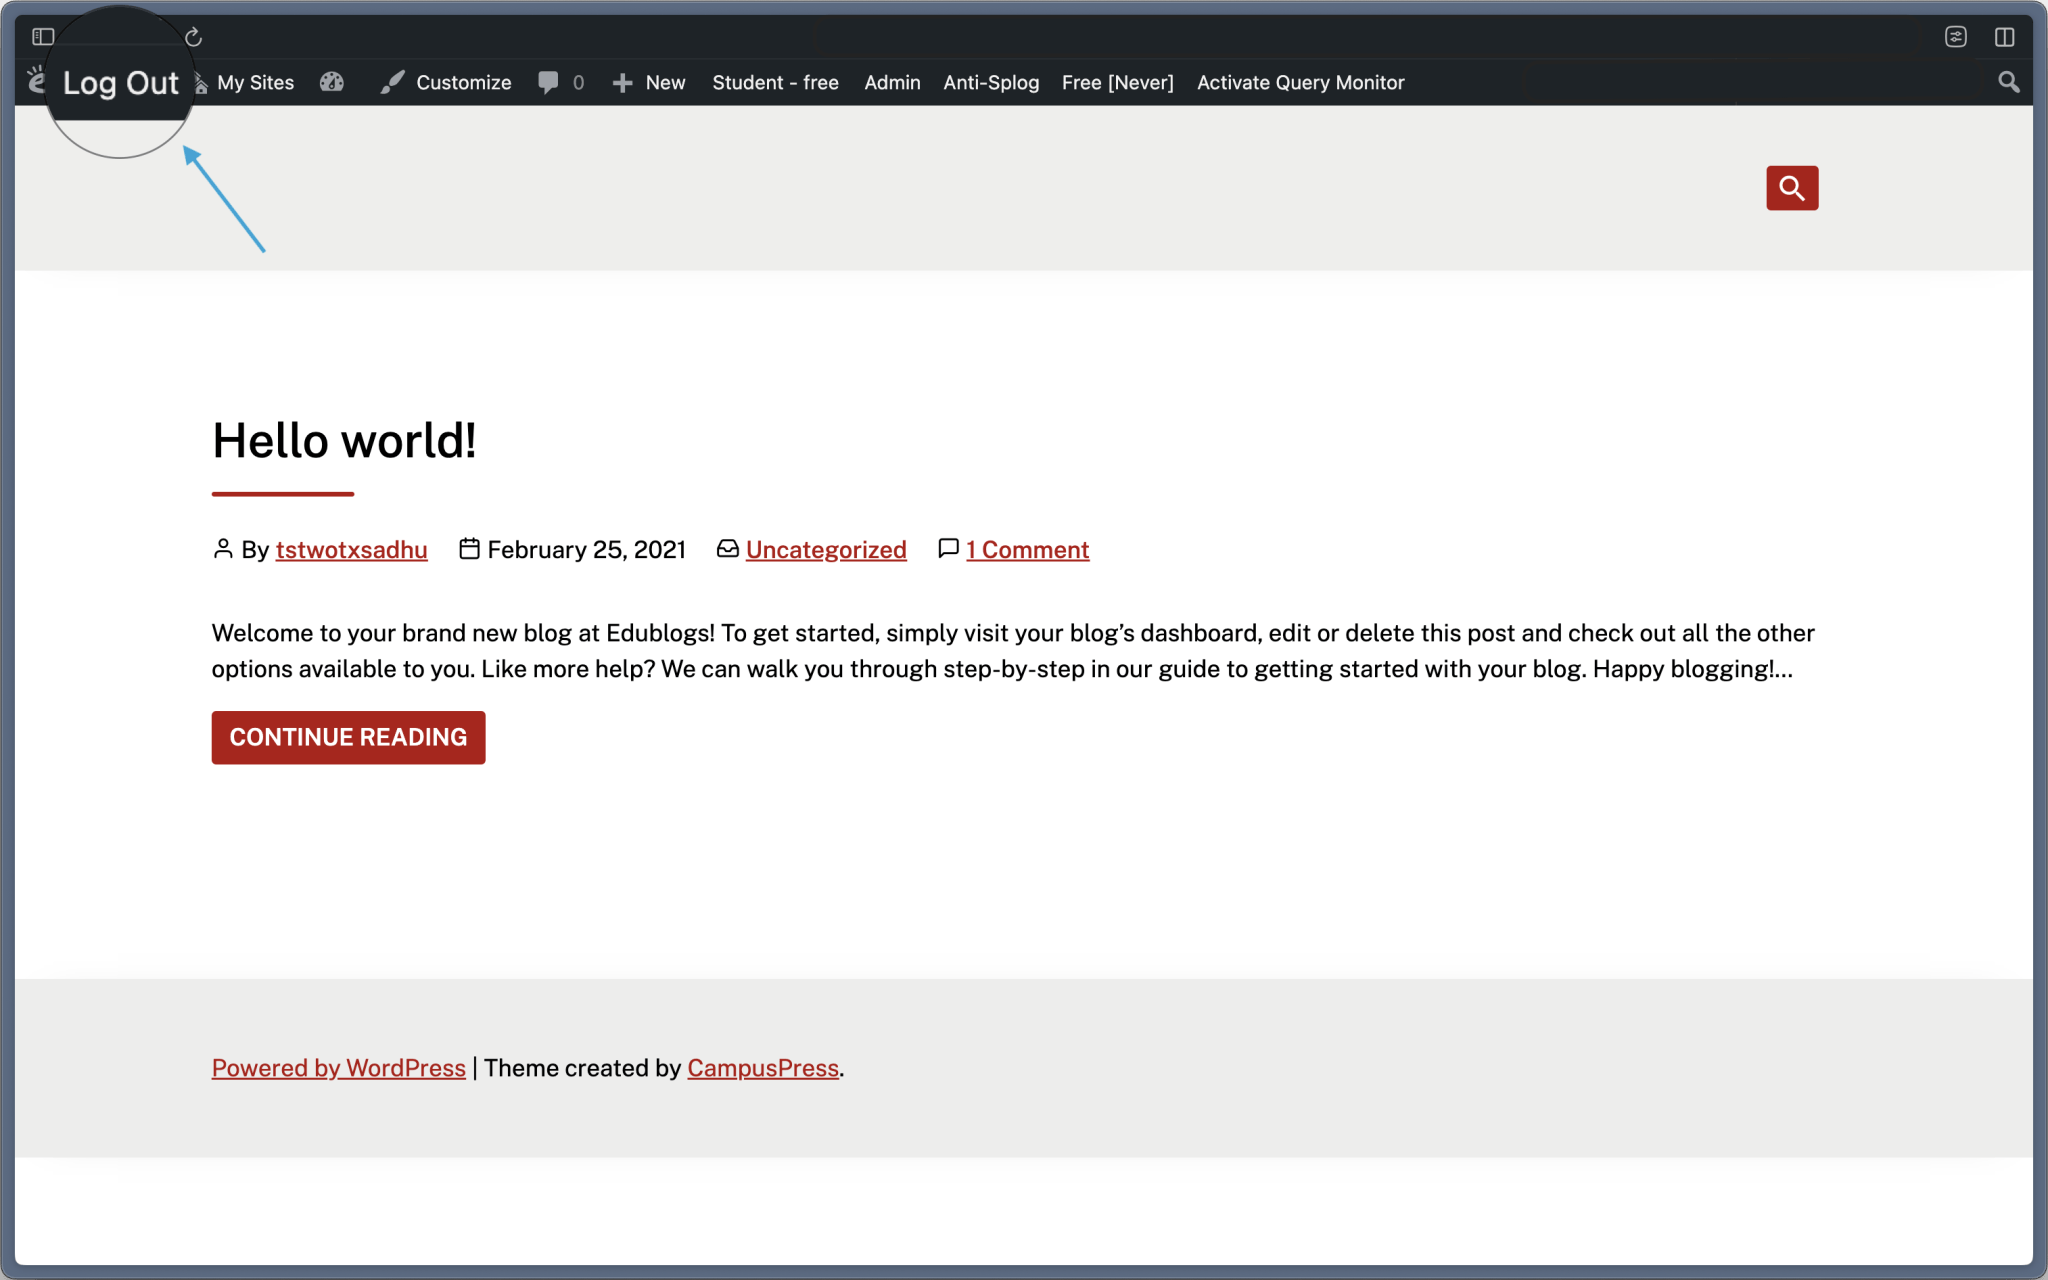
Log In/Out Link
The accessibility plugin automatically adds a Log In/Out link to your site to make it easier for visually impaired users to log in/out and it can’t be disabled.
Add Skiplinks
Most sites have lots of links on a page before you get to the main content. Without skiplinks a screen reader user is forced to go through every link including the navigation menu before they reach your content.
Skiplinks ensure screen reader users find your main content every time. All pages should have a structural first heading, but if there’s a page without one, the skiplink will still put the user in the main page content without having to guess. It also offers a useful option to jump directly to the main content without tabbing through all the header items first.
You only need to enable skiplinks if the theme you are using hasn’t added skiplinks. Newer responsive themes are more likely to include skiplinks.
You can check if your theme has added skiplinks by viewing the HTML source code of your site as follows:
1. Go to the front page of your site.
2. Press Ctrl+U or Command + Option + U (Safari) on your keyboard.
3. This loads the HTML source code for that page in a new browser tab.
4. Press Ctrl+F (Windows) or Command+F (Mac)
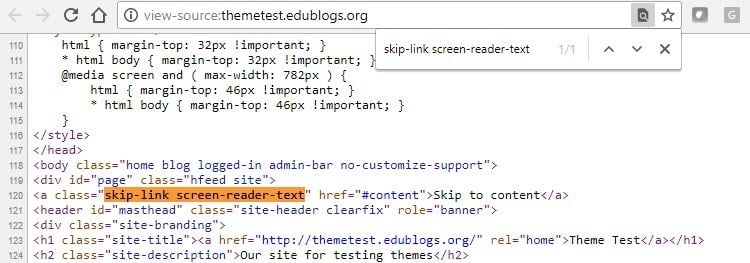
5. Search using terms like “skip-link screen-reader-text” and “Skip to content” – varies with theme so you may need to try several different search terms.
Here is a theme that has skiplinks added:
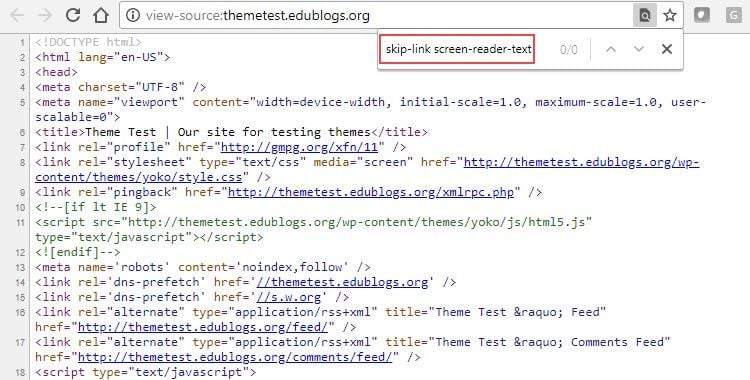
Here is a theme that doesn’t have skip links added:
You add skiplinks to a theme as follows:
1. Locate the ID for the content main container by searching for the <article tag in the HTML source code.
The name of the main container can vary. This theme’s ID for the content main container is ‘content’.

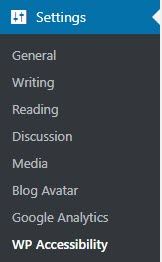
2. Go to Settings > WP Accessibility
3. Select ‘Enable Skiplinks’ and add the ID of your main content container
The ID of the main content container for this theme is content.

4. Click Update Skiplink Settings.
The other Add Skiplink options aren’t required and are intended for advance use: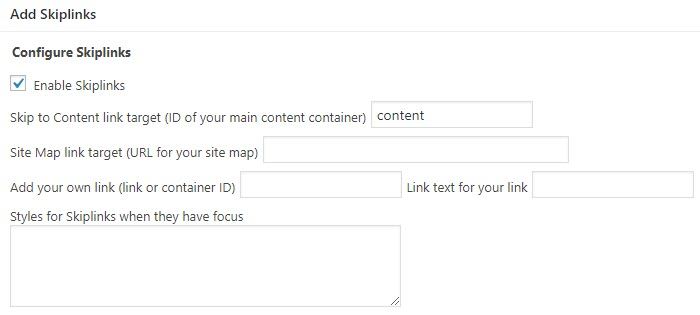
- Site Map link target (URL for your site map) – used to add a skiplink to your website visitors sitemap page.
- Add your own link (link or container ID) – used to add your own skip link. Designed for situations where a complex layout has been used such multiple important menus and skip destinations.
- Styles for Skiplinks when they have focus – allows you to add CSS styles to when a user tabs and focus is placed on the skip links.
Accessibility Toolbar Settings
The accessibility toolbar is an optional toolbar that you can add to your site which allows users to adjust font size or view your site in high contrast color mode. Its settings allow you to control what functionality is displayed in the toolbar and where the toolbar is displayed. If your theme is already high contrast with spacious fonts you don’t need to enable this.
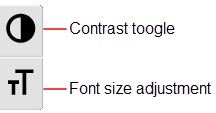
By default, users see the Accessibility Toolbar bar on the left side of your site when Add Accessibility toolbar with fontsize adjustment and contrast toggle is selected.
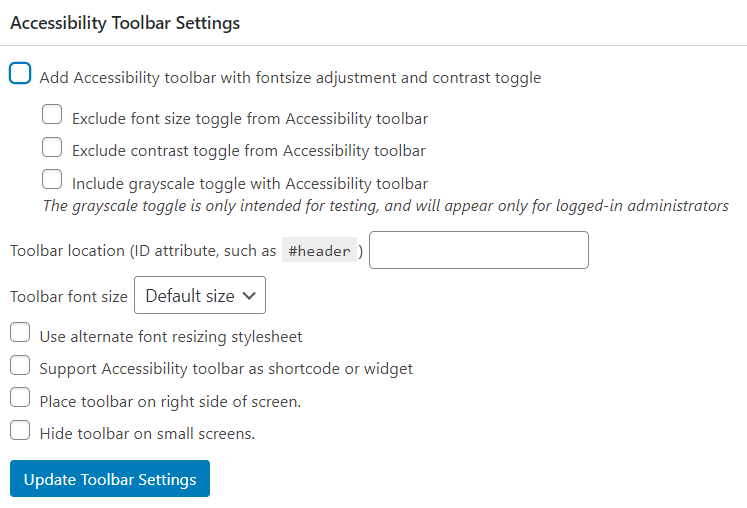
The accessibility toolbar can be displayed on the left side of screen, right side of screen or added to your sidebar using the Accessibility Toolbar widget or adding the [wpa_toolbar] shortcode to a text widget.
Here is what high contrast mode look like on a responsive theme:

It is almost impossible for the Accessibility Toolbar to guarantee a good result for large text or high contrast modes.
Support can be added using a custom theme:
- By placing a stylesheet called a11y-contrast.css in your theme’s stylesheet directory.
- Assigning large print in the body class .fontsize in your theme stylesheet.
Miscellaneous Accessibility Settings
By default, the following miscellaneous accessibility settings are enabled and for most situations these should be kept enabled:
- Remove target attributes from links
- Force search error on empty search submission
- Remove tabindex from focusable elements
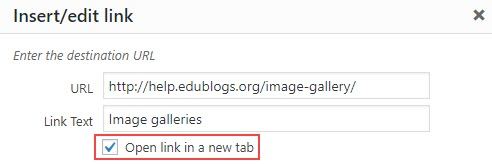
Remove target attributes from links
Remove target attributes from links disables “Open link in a new tab” and makes all links open in the same tab. Opening links in a new tab can be an accessibility issue for those using assistive technology.
Add Site Language and text direction to HTML element
Screen readers use the site’s declared language to work out what pronunciation to use. If no language is declared, then the screen ready uses the screen reader user’s installation language or tries to guess.

You don’t need to enable “Add Site Language and text direction to HTML element” as this is common to WordPress themes and you shouldn’t enable if using a multi-lingual site.
Add post title to “more” links
Some themes and archive pages show excerpt of the posts with a link to read the entire post. By default, the link is plain text that says “Continue Reading”, “Read More” or equivalent.

You should enable “Add post title to “more” links” as this adds the title of the post into the ‘Continue Reading’ link for screen reader users. Instead of hearing “Continue Reading, Continue Reading”, the user will hear “Continue Reading The Edublogger’s Guide to Podcasting, Continue Reading Connect with the World through Skype in the Classroom” and be able to select which article they want to read from the set of links.
Add landmark roles to HTML5 structural elements

“Add Landmark roles to HTML5 structural elements” is designed to help screen readers navigate around the page. Turning on this option automatically adds the appropriate role attribute to the first header, the last footer, any main element, and each nav element. Support for HTML5 structural elements isn’t great which is why you may need to enable this option.
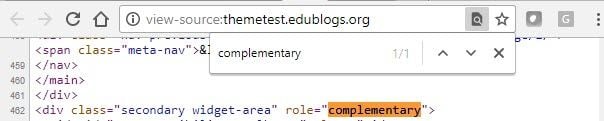
Search your HTML source code using term complementary. If you see role=”complementary” it means the landmarks exist in the theme and it doesn’t need to be enabled.
Automatically Label WordPress search form and comment forms

You should enable “Automatically Label WordPress search form and comment forms” as it adds labels to old forms that might not be labeled. Labels tell screen reader users what the field is for.
Force underline on all links

When “Force underline on all links” is enabled every link on your site is underlined including navigation links. This helps those who are keyboard dependent or color blind identify links and keep track of where they are on the page.
It’s personal preference as to whether you enable “Force underline on all links”. Best option is to enable it then check your site to see how underlining looks.
Support longdesc on featured images

‘Support longdesc on featured images” should be enabled if you ever add an image with a long description.
Make row actions always visible

Enable “Make row actions always visible” if you have a vision impaired person accessing the dashboard as this will keep the Edit, Quick Edit, Trash, View action links visible in their dashboard.
Remove title attributes inserted into post content and featured images

“Remove title attributes inserted into post content and featured images” should be enabled to ensure that the screen reader doesn’t read both the title attribute and the link text.
Enable diagnostic CSS

“Enable diagnostic CSS” is used for testing and debugging only; it is intended for an advanced user.
Add outline to elements on keyboard focus

Themes generally don’t include adequate ways of showing when a keyboard user brings focus on a link or focusable field which makes it difficult for those who are keyboard dependent to keep track of where they are. You can test your theme by tab through a chuck of the theme. If you can’t easily see where you are in the theme you should enable “Add outline to elements on keyboard focus”. This places a black outline around your links when you use the tab key to navigate the page. Adding the outline color changes it from black to your preferred color outline.
In the example below the post title text is outlined in blue when the user tabs on the post title to help them keep track of where they are on the page. As they tab through the page the outline moves to the next focusable field.
Non-visually identify currently active menu item

Enable “Non-visually identify currently active menu item” as it adds aria-current=”true” to announce current menu items for screen reader users.
Remove Title Attributes
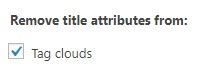
By default, remove title attributes from Tag clouds is enabled since you don’t want a screen reader reading both the title attribute of links and the link text.
Color Contrast Tester
Some visually impaired users may be able to see but could struggle with color blindness or poor eyesight. The color contrast tested enables you to add the color hexadecimal of your text foreground and background then tells you if that part of your site passes the test.
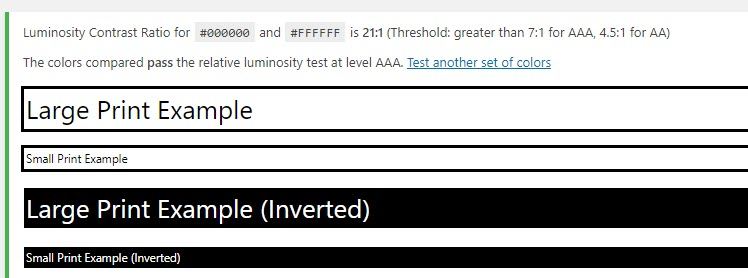
Below is the information added for a theme that has a post area with a white background and black text:

And the color contrast results for the post content area:
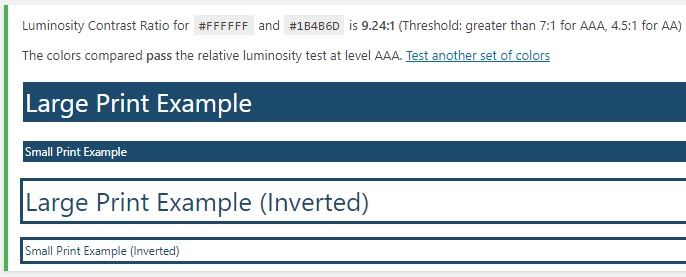
Below is the information added for a theme that has a header navigation area with a dark blue background and white text:
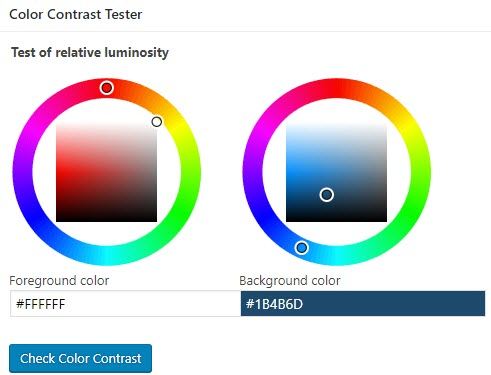
And the color contrast results for the header navigation colors:
Privacy
The accessibility toolbar sets cookies to maintain awareness of the user’s selected accessibility options. If the toolbar is not in use, WP Accessibility does not set any cookies.
Information Collected by WP Accessibility
WP Accessibility does not collect any private information about users or visitors.