Setting up Google Analytics
Google Analytics is used to provide detailed statistics of visits to your blog such as who’s coming to your blog site, how they’re getting there and what interests them.
Google Analytics can be enabled in Edublogs Pro, Student blogs (attached to an Edublogs Pro via My Class), and CampusPress blogs.
If you are a Super Admin of a CampusPress network and are interested in enabling Google Analytics on all of the blogs in your network, please read this guide.
Create Google Analytics account
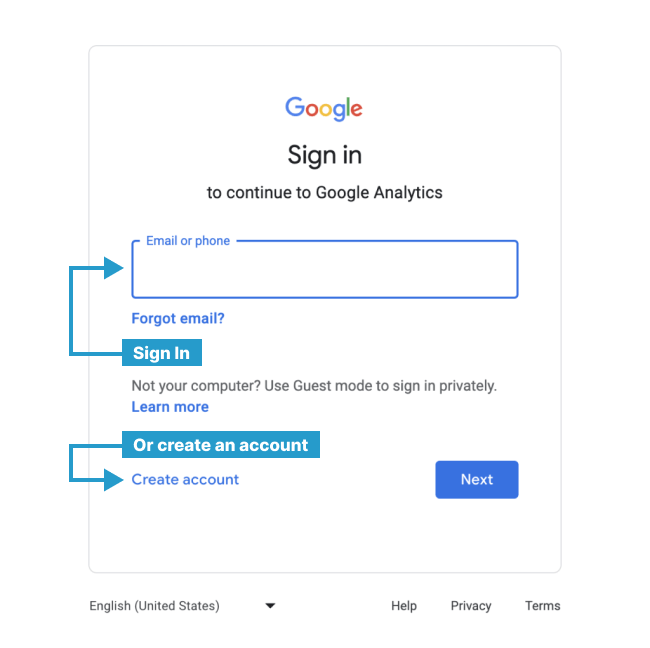
1. If you are new to Google Analytics, click on the link to “sign up for Google Analytics” or go to https://analytics.google.com/analytics/web/.
2. Sign in with your Gmail account or click on Create Account to create a Gmail account.
Set up Google Analytics Tracking ID
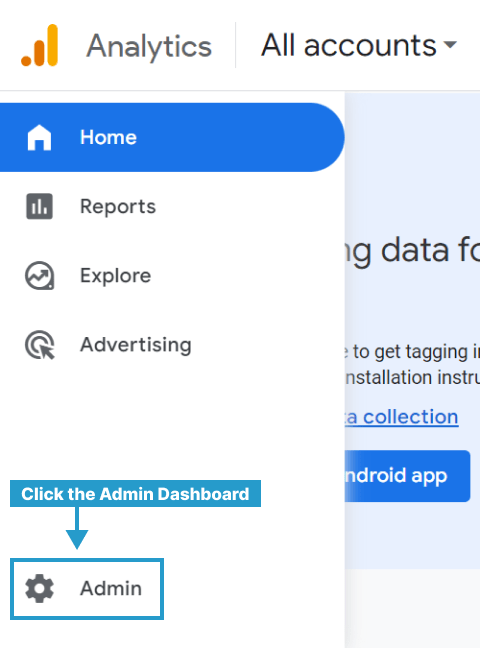
Once you have created a Google Analytics account, you’ll need to create a tracking ID for your blog.
1. In your Google Analytics account, click the Admin dashboard.
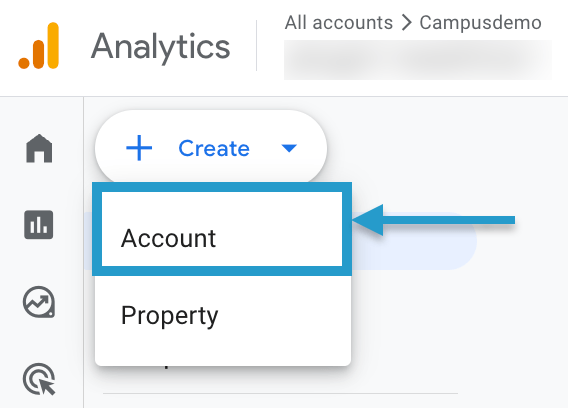
2. Under the “Create” button, click on “Account”.
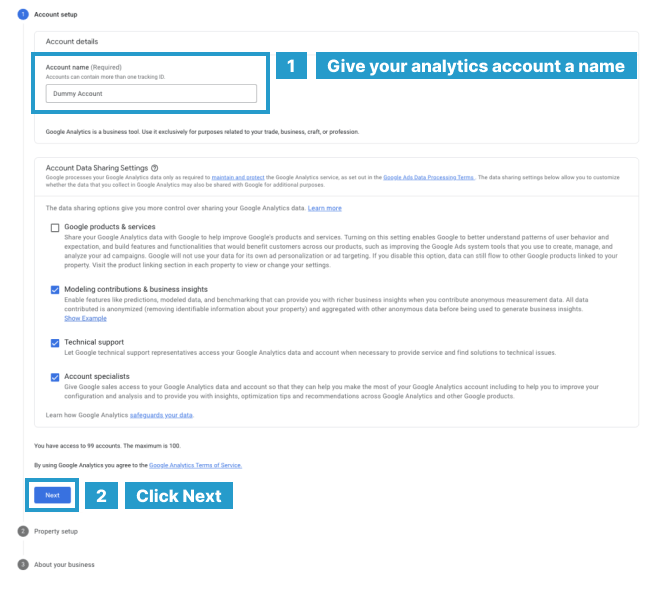
3. Give your analytics account a name and click next.
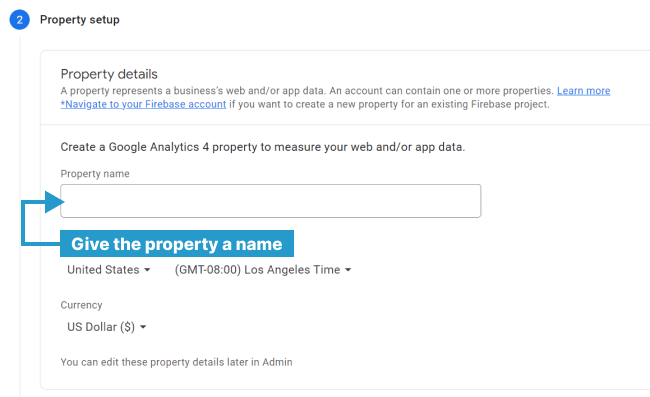
4. Within the property setup wizard, give the property a name and click “Next”.
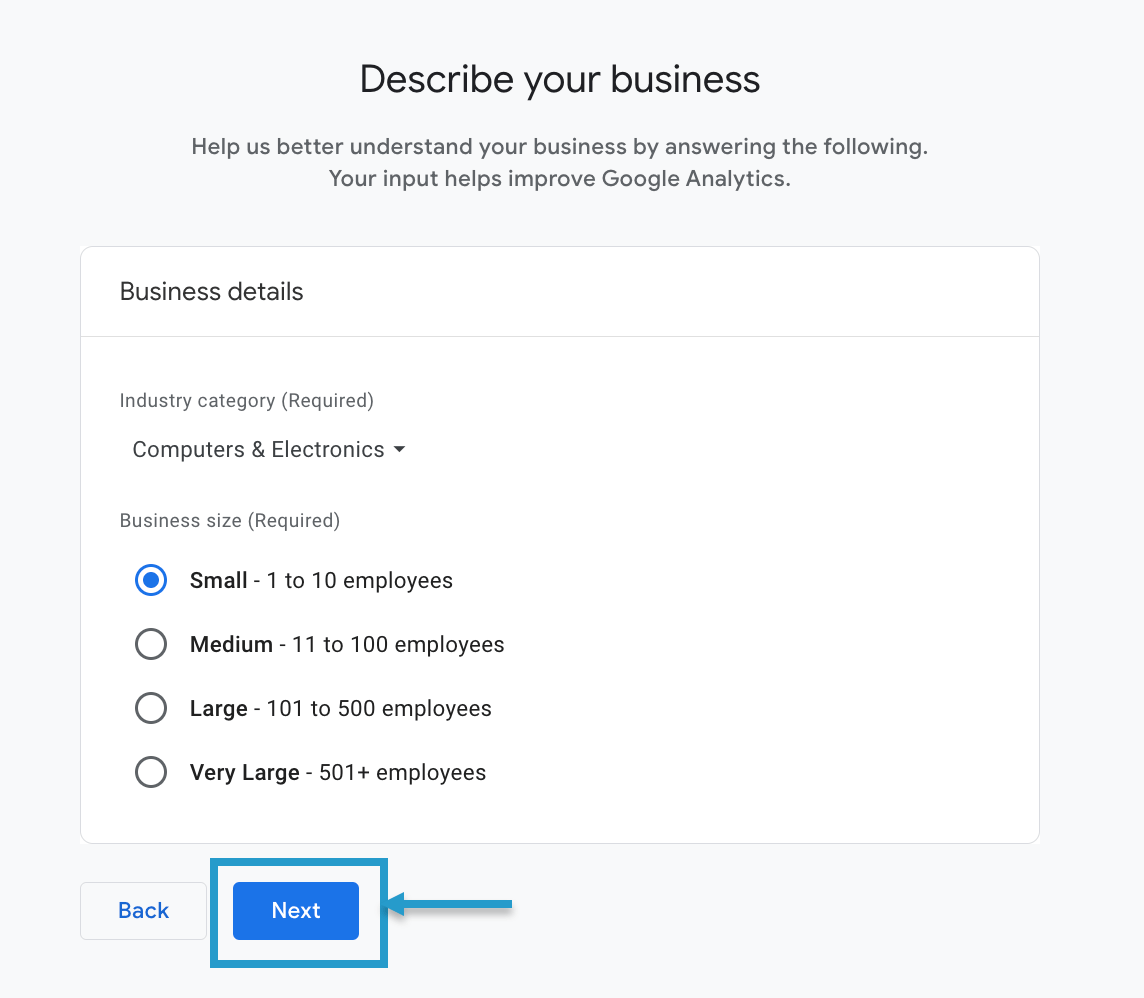
5. In the next step, add your business details and click on “Next”.
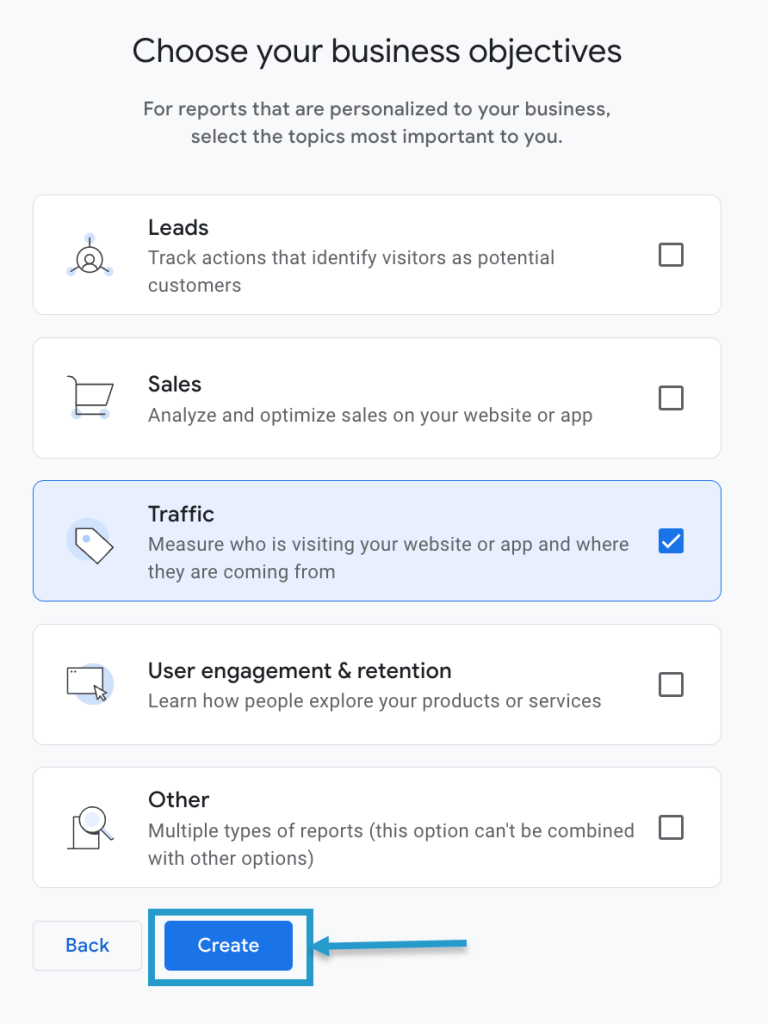
6. After that you will be asked to select business objectives. Select the objectives and click on “Create”
7. You will be prompted next to the “Google Analytics Terms of Service Agreement” pop-up. Accept the terms.

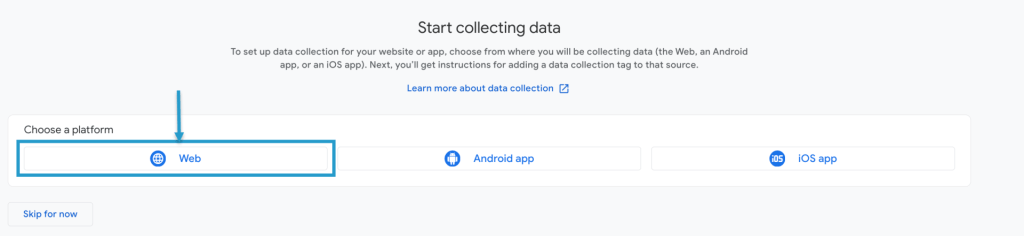
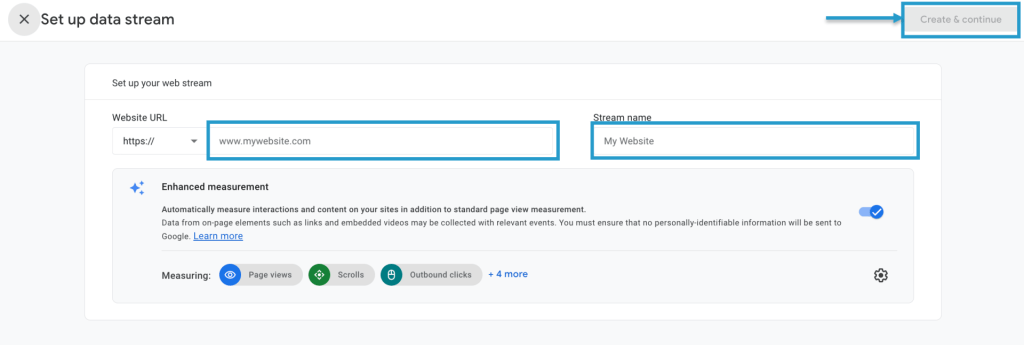
8. You will then be forwarded to the Data Collection step. Selecting “Web” will bring a popup.
Within the popup, add your website URL and set a stream name according to your preference and then click on “Create & Continue”.
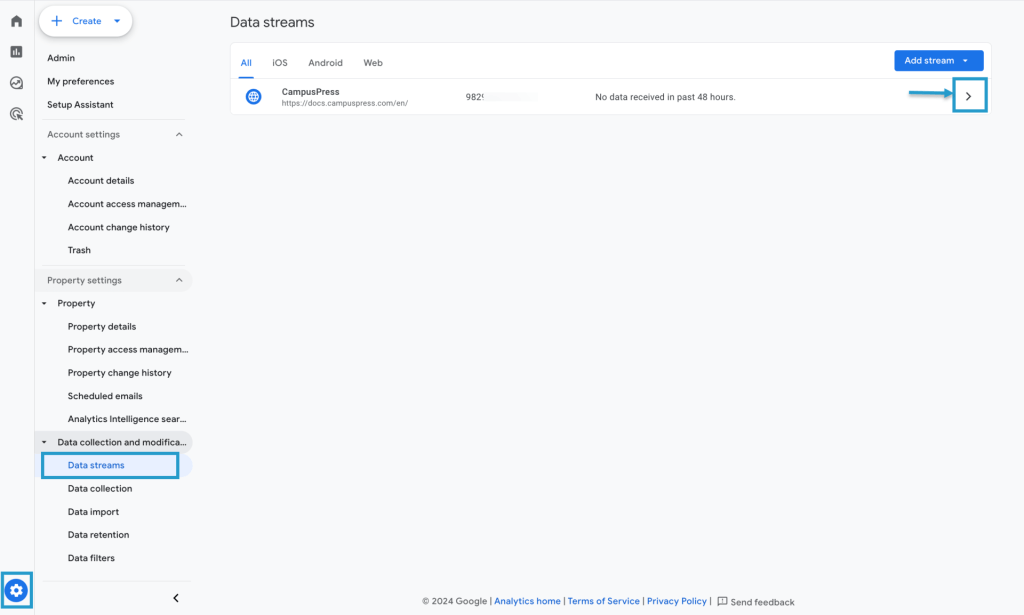
9. Once the stream is created, you will be redirected to the “Web stream details” window. Copy the Measurement ID from there.

You can also find the Measurement ID later from Admin Dashboard > Data collection & modification > Data streams
Set Basic Network Tracking Settings
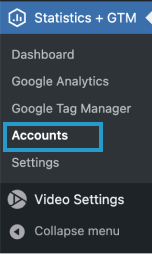
1. Go to Statistics + GTM > Accounts in your blog dashboard.
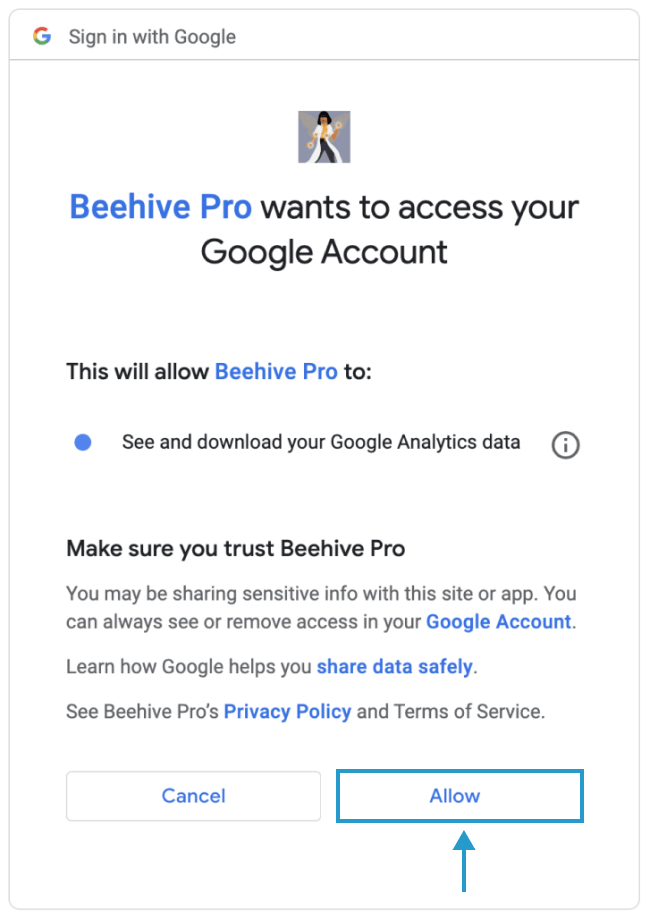
2. Click Connect with Google.
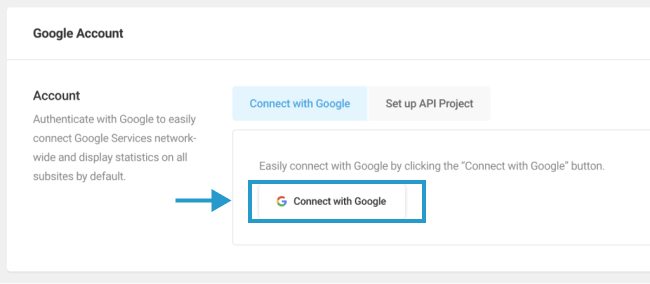
3. Grant Google Analytics access.
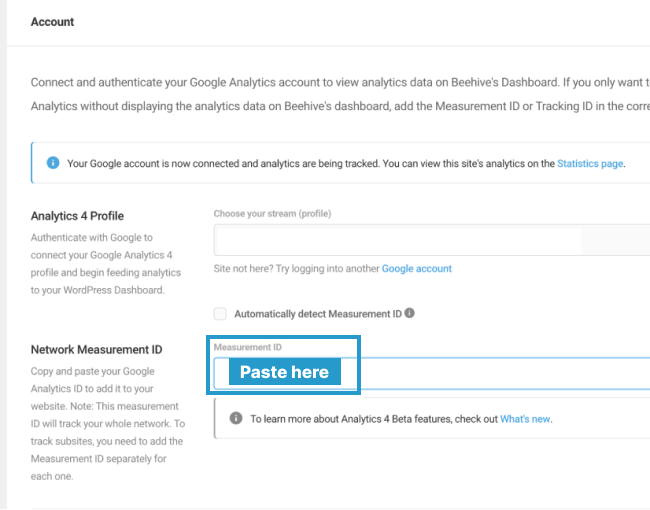
4. Paste your Google Analytics 4 Measurement ID in Statistics+GTM > Google Analytics > Accounts.
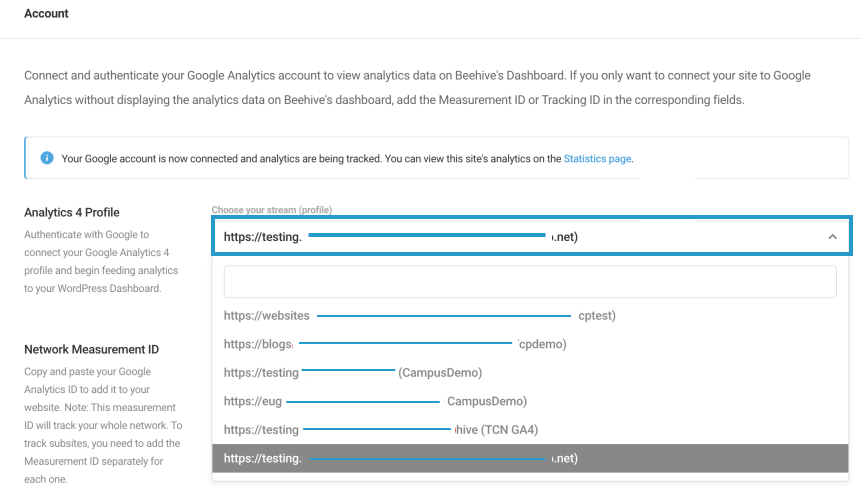
5. Select Analytics Profile for your blog from the drop-down menu.
6. Click Save Changes.

Note:
- After saving changes, your Dashboard > Statistics may take up to 24 hours to load visitor data.
- If your blog is part of a CampusPress network, your Super Admin may have set Statistics to display visitors across the entire network by default. Your new data should load within 24 hours.
- You can view more in-depth information about your visitors info here: https://analytics.google.com/analytics/web/
- If you want outside visitors to come to your blog, make sure to set your Site Settings to “Allow search engines to index this site.” in Settings > Reading.
- To learn more about the statistics displayed, read this quick tutorial.