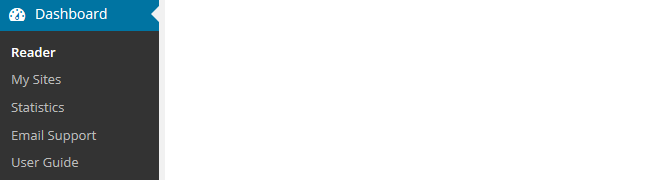
The fastest way teachers and their students are to be able to quickly read posts and leave comments across a class of students’ blogs is to use the Reader.
Reading Student posts
The Reader automatically feeds all published posts from all student blogs and the class blog into the dashboard of every user attached to My Class so that you and your students can easily read and comment on each others’ posts.
Reading posts is as simple as:
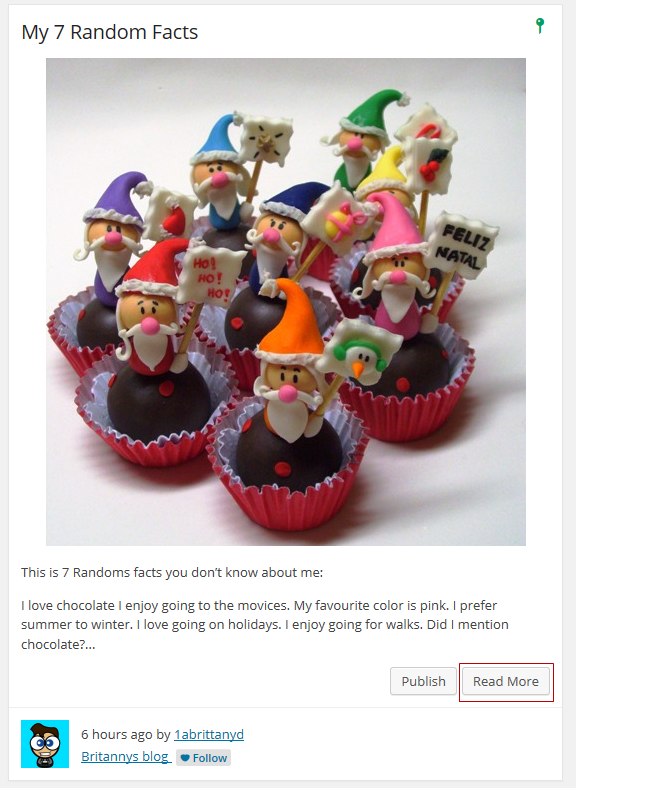
1. Go to Dashboard > Reader.
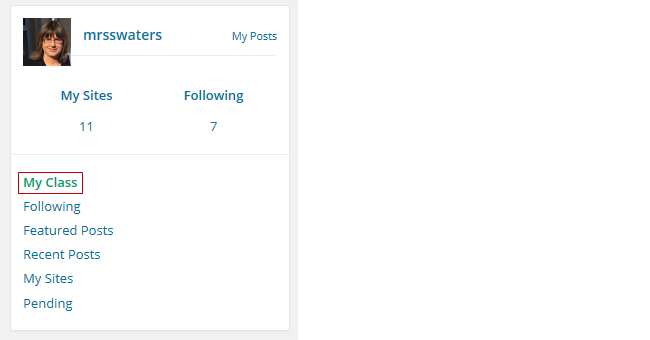
2. Click on My Class.
3. Click on Read More if you want to read the full post.
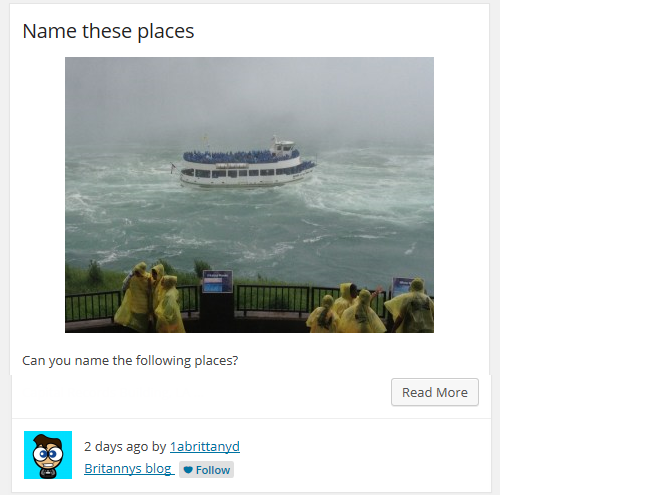
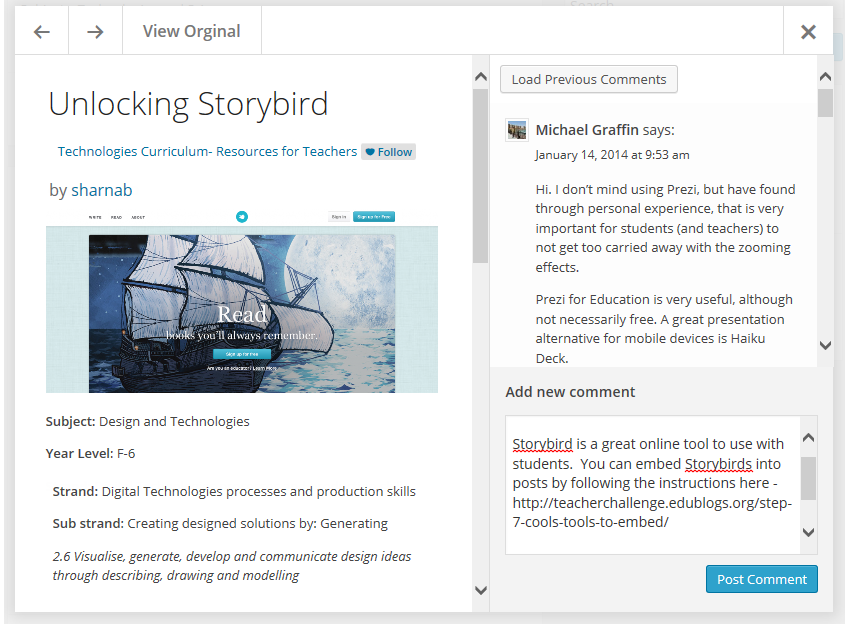
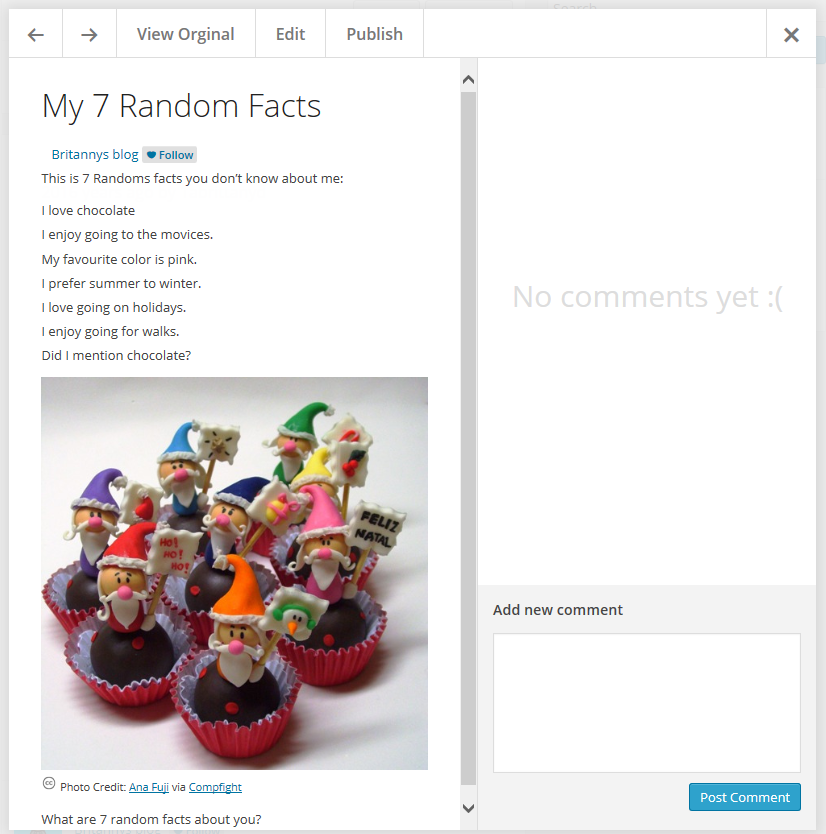
This displays the full post and allows you to select from the following options:
- View Original – when you click on ‘View original’ it loads the draft post on the student blog where you can see what the post will look like when published.
- Edit – clicking on Edit opens the post inside the dashboard of the student blog where you can make edits to the post (only visible to the teacher).
- Add New Comment – allows you to add a comment to the post from inside your dashboard.
- The forward and back arrows allow you to scroll to the next or previous student post or comment. This makes reading on a mobile device easy!

Commenting on Posts
Commenting on a post is as simple as:
1. Click on Read More.
2. Add your comment.
3. Click Post Comment.
Private Comments
Users can check and read private comments in the Reader by opening the post from the “Read more” button or will show up in the feed of other comments in the ‘Reader’. Private comments can only be created and read by those that can edit the post. This means blog admins, teachers, editors, and the author of the post.
1. Go to Dashboard > Reader
Select “Read More” on the post you want to leave to comment on
2. This opens up the post in a pop-up. Add the comment in the lower-right side and make sure to check the “Private comment” box before submitting.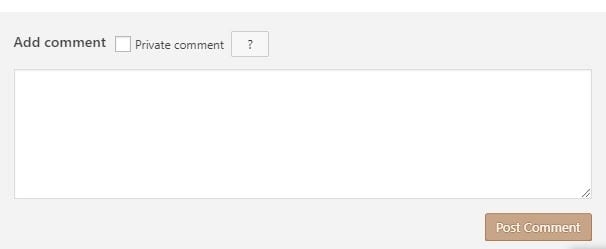
3. Private comments will also show on light-blue background.

Reader and privacy on student blogs
By default, posts and comments from all student blogs automatically feed into the reader where you and your students can read. If you are using a privacy option like “I would like anyone who provides the following password to have access to all blogs” — don’t worry — only you and your students see these posts and comments in the reader.
If you don’t want students to be able read posts and comments on class mates blogs you can disable it as follows:
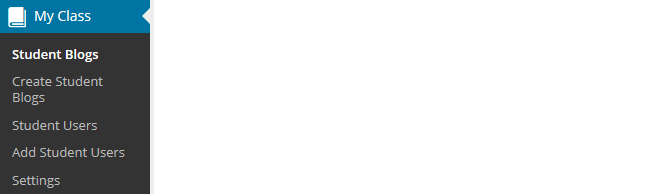
1. Go to My Class > Settings
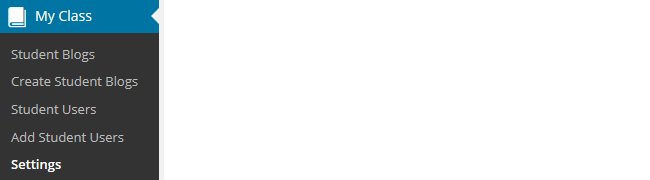
2. Uncheck “Allow all students in this class to read each other’s posts in the dashboard ‘Reader’ Tool”.
![]()
3. Click Save and leave your web browser tab open while all student blogs are updated.
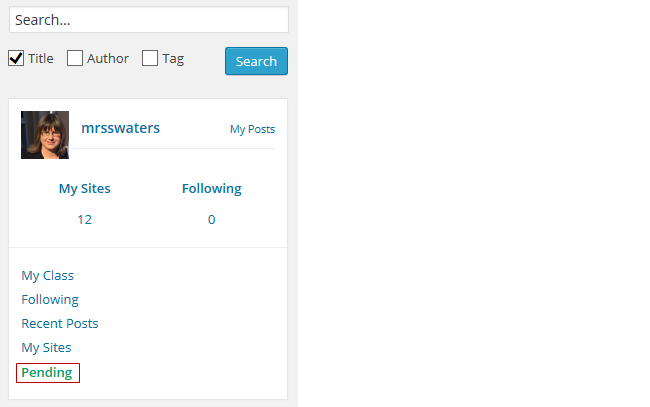
Approve Pending Posts and comments
The Reader is the fastest way for you to check all pending posts and comments on your student blogs. This allows you to preview posts and comments and publish them with one click!
You would use the Reader if you used either or both of the following My Class settings:

Please note you’ll still see pending comments lists on My Class > Student blogs even if you selected not to moderate comments on student blogs. You don’t need to approve these commets; you just need to remind students that they have comments pending review and need to approve the comments themselves.
Previewing and approving posts and comments is as simple as:
1. Go to Dashboard > Reader.
2. Click on Pending
On the pending page posts and comments are listed in reverse chronological order based on the date they were submitted.
3. Click on Read More if you want to read the full post or click on Publish if you are happy to publish the post.
- Please note if you selected “I must approve all posts’ students aren’t able to edit the post once it is published.
- If you want the students to do further edits you need to leave the post as pending or change the post to draft mode by opening it in edit mode.
This displays the full post and allows you to select from the following options:
- View Original – when you click on ‘View original’ it loads the draft post on the student blog where you can see what the post will look like when published.
- Edit – clicking on Edit opens the post inside the dashboard of the student blog where you can make edits to the post.
- Publish – to publish the post click on Publish. Please note if you selected “I must approve all posts’ students aren’t able to edit the post once it is published. If you want the students to do further edits you need to leave the post as pending or change the post to draft mode by opening it in edit mode.
- The forward and back arrows allow you to scroll to the next or previous student post or comment.
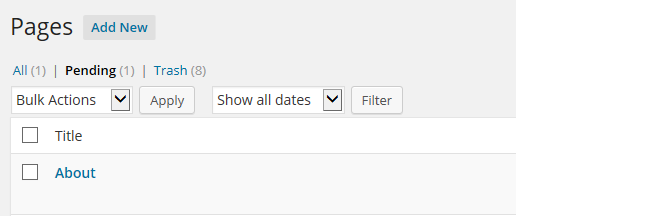
Approve Pending Pages
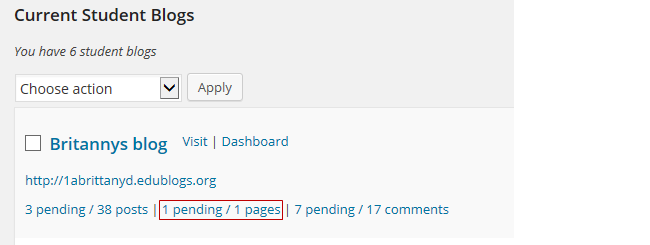
1. Go to My Class > Student blogs.
- All your student blogs attached to My Class are listed here.
- This is where you’ll see the number of published and pending posts / pages / comments
2. Click on the link to pending pages under a student blog.
3. This takes you to the pending page inside the student blog dashboard.
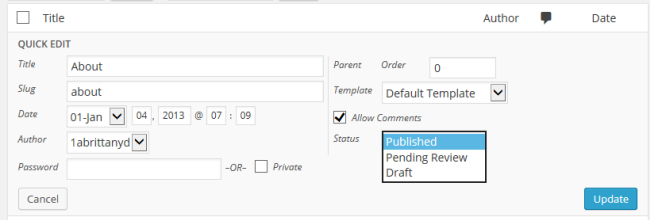
4. Now all you need to do is click on Edit.

5. Review the page and then click Publish.
- Alternatively, add your feedback and click Save as Pending if you want the student to make more edits to their post.
- Once a post is published the student can’t edit the post.
6. Alternatively, you can click on Quick Edit, change the post status to Published and click Update if you don’t want to open the post in Edit mode.
7. Go to back to My Class > Student blogs inside your class blog.
8. Repeat this process for all pending pages on your student blogs.