Domain mapping and using your own domain
Your Edublogs.org site comes with a free address like myblog.edublogs.org. You can remove the .edublogs.org part and use your own custom domain like myblog.com or myblog.oursite.com using domain mapping.
To set up custom domain mapping you need to:
- Purchase your own domain name from a domain hosting company. Custom domains start from around $10 per year.
- Be able to access the DNS settings for your domain
If you do not currently own a Domain Name, GoDaddy is a great place to purchase one.
These instructions refer to domain mapping an Edublogs.org.
This is an Edublogs Pro feature only.
Set up domain mapping
1. Purchase your new domain from a domain hosting company like GoDaddy.
2. Log into your dashboard.
3. Go to Tools > Domain Mapping
4. Enter your new domain under Custom domain and then click Add.

5. Log into your DNS control panel or send a support request to your registrar (the company or organization you’ve purchased the domain name from)
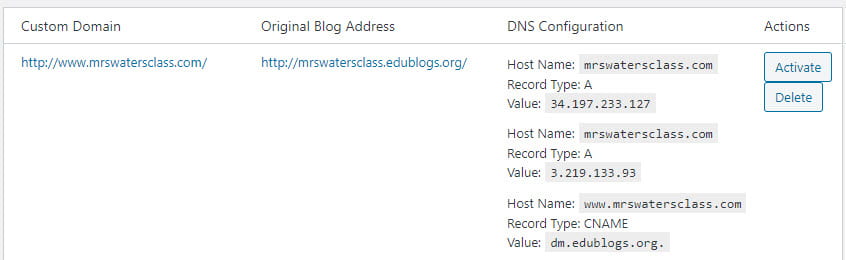
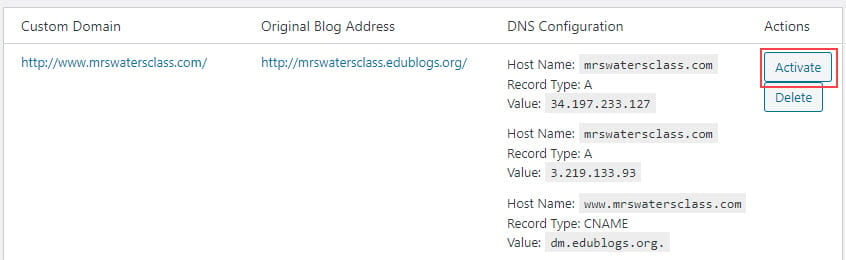
6. Configure your DNS records using the DNS configuration information on your domain mapping page.
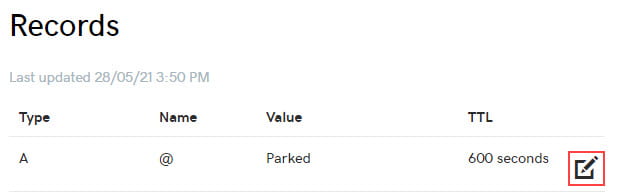
Below is an example of the records you should see if you have purchased the domain:
Here’s how to configure your domain if you are using GoDaddy
1. Log into your GoDaddy Account
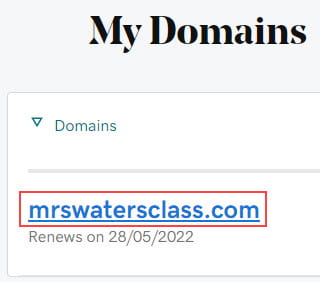
2. Navigate to your domain list (located under Domains > All Domains)
3. Click on your domain name.
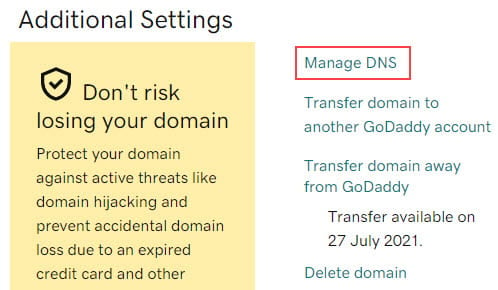
4. Scroll down to Additional Settings and click on Manage DNS.
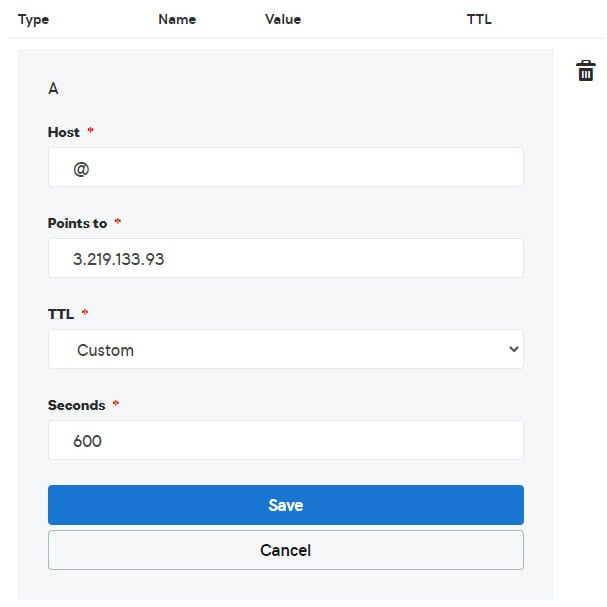
5. Click the Edit icon in the @ row under A (Host)
6. Change the A record to the first value listed in Tools > Domain mapping of your domain mapped Edublogs.org site and then click Save.
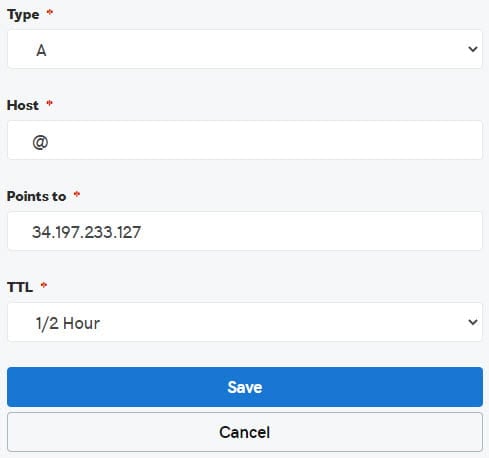
7. Scroll to bottom of page and click Add. Select Type as A, add @ for host, add the new Value into Points to for the second record, change TTL to 1/2 hours and click Save.
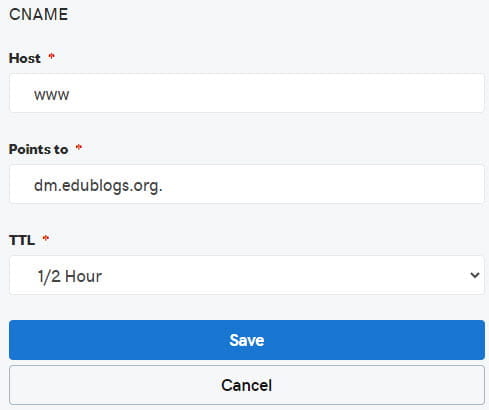
8. Scroll down to www. under CName and click on the Edit icon.

9. Change Points to the CName record shown on your domain mapping page and then click Save.
- Please note the CName should be added exactly as shown on your domain mapping page i.e. typed with the dot on the end of dm.edublogs.org. – GoDaddy doesn’t allow you to use the dot of the end of the CName which is why it isn’t shown in the example below.
- If you can’t add the CName with the dot then try again without the dot at the end of dm.edublogs.org.
10. Go to Tools > Domain Mapping inside your dashboard.
11. Click on Activate.
12. If your domain has finished propagating it will automatically be activated and your site will automatically redirect to your new domain.
13. If your domain hasn’t finished propagating you will see a message saying how much longer you need to wait.
- Your TTL controls how long your domain takes to resolve. If your TTL is 30 minutes it could take 30 minutes to an hour to resolve.
Here is what the message looks like:

14. This means you need to return to Tools > Domain Mapping and click Activate after that many minutes or hours.
Add SSL Certificate
To add an SSL Certificate you need to use Cloudflare.
Here’s how to add a Cloudflare SSL Certificate to your domain if you are using GoDaddy:
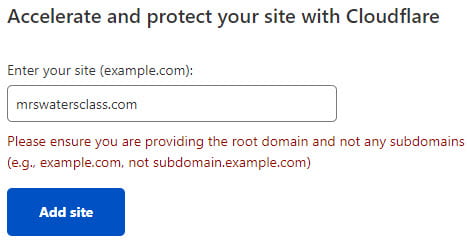
1. Go to Cloudflare and sign up for an account.
2. Add your domain and click Add Site.
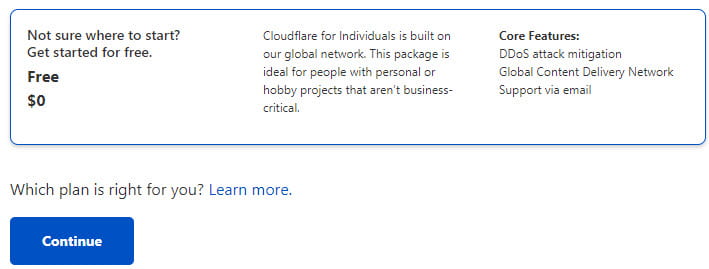
3. Select the Free plan and press Continue.
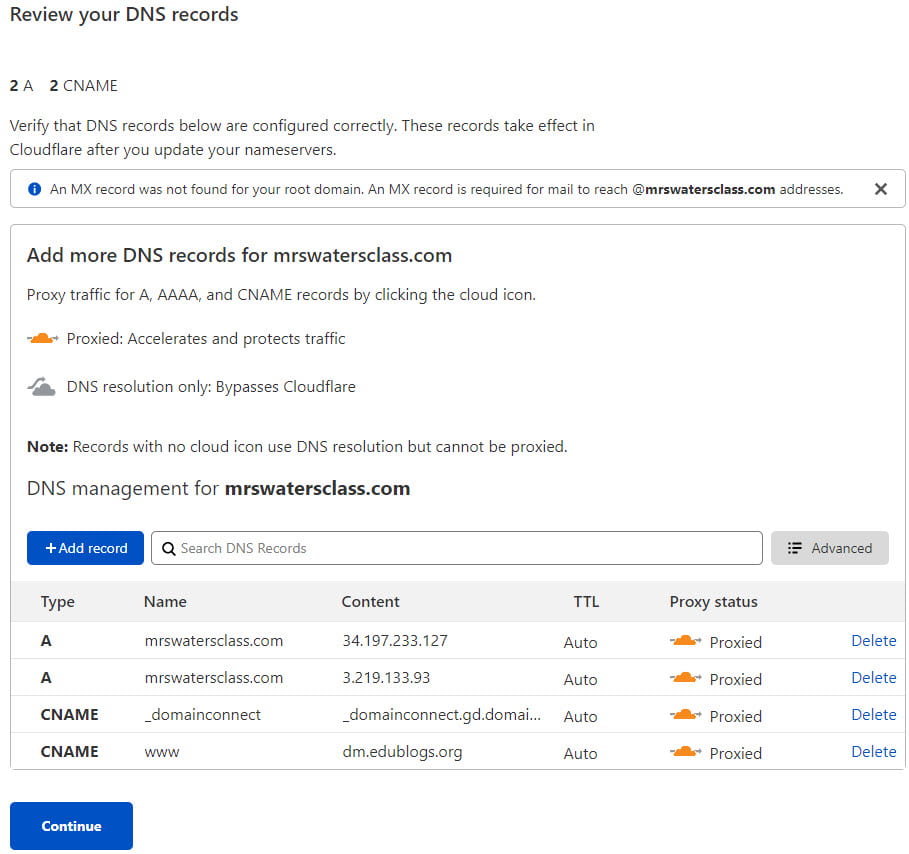
4. Review your DNS records and click Continue if correct.
5. The next step is to update your nameservers.
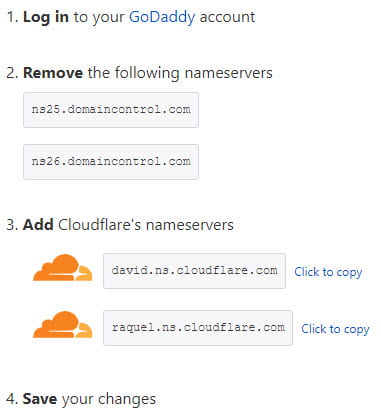
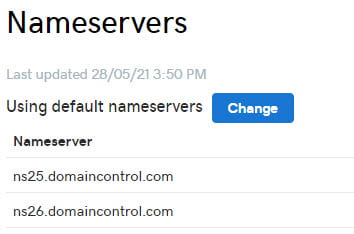
6. Click on Change next to Nameservers in Manage DNS inside your GoDaddy account.
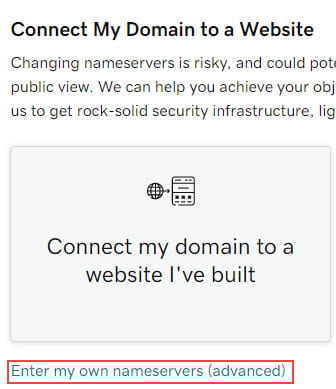
7. Click on Enter my own nameservers (advanced).
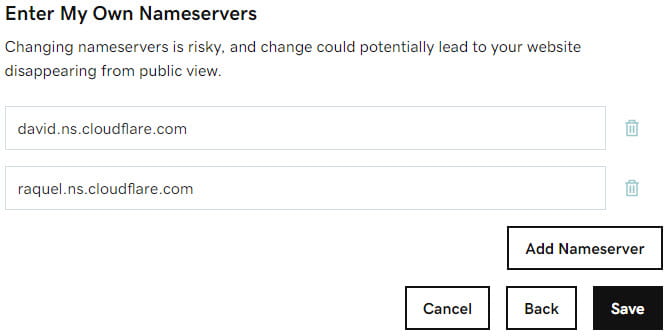
8. Change your nameservers to Cloudflare’s nameservers and click Save.
9. Consent to the change and click Continue.

10. Click on Done, check nameservers inside your Cloudflare account.
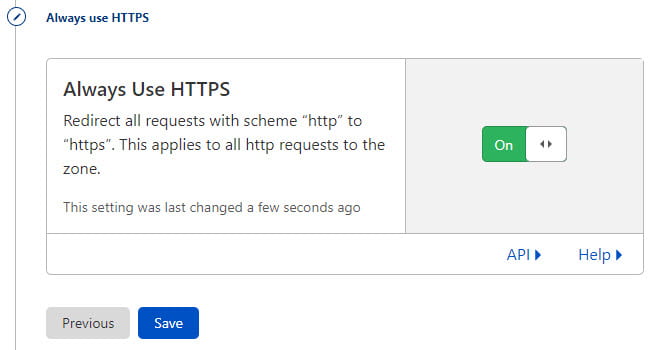
11. On the Quick Start Guide page set Automatic HTTPS rewrites and Always use HTTPS to On.
12. Click Finish.
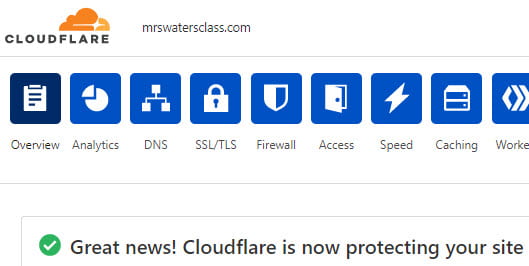
13. A message displays inside your Cloudflare account and you will be sent an email once the SSL Certificate has been applied to your site.
Troubleshooting
Contact your domain hosting company if you are having trouble configuring your DNS records. Their support team will be able to add your DNS records if you provide the DNS configuration information from Tools > Domain Mapping.