The Embed Any Document plugin is a quick and easy tool to help you embed any document into posts and pages.
To get started you need to activate Embed Any Document in Plugins > All.
Upload Document
You embed your own documents as follows:
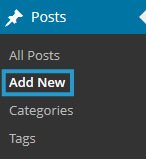
1. Go to Posts > Add New (or Pages > Add New)
2. Write your post.
3. Place your cursor where you want the document to be embedded and add a document block if you are using the block editor and then click on Add Document.
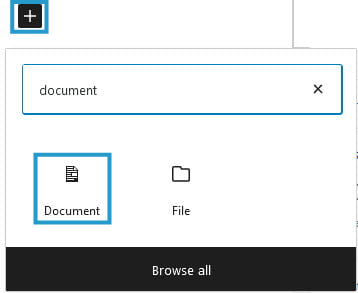
Click on the Add Document icon if you are using the Classic Editor.

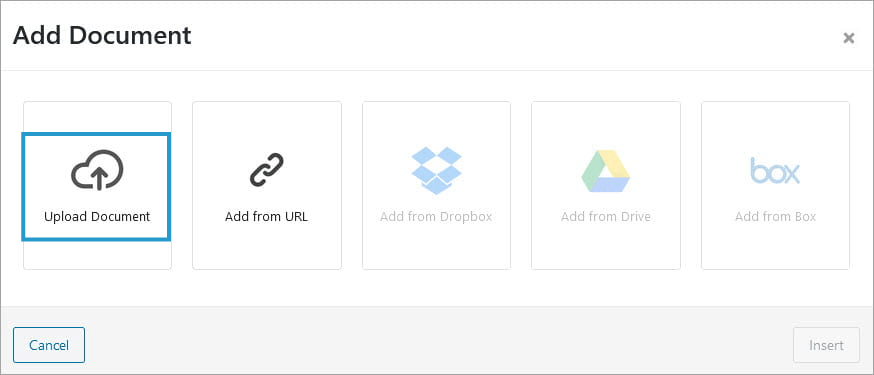
4. Click on Upload Document to upload a file from your computer or add a file from your media library.
5. Click on Insert once your file is uploaded or selected.
6. The embedded document is added to your post editor as a preview if you are using the block editor or as shortcode if you are using the classic editor.
7. When you have finished writing click Publish.
Important tip:
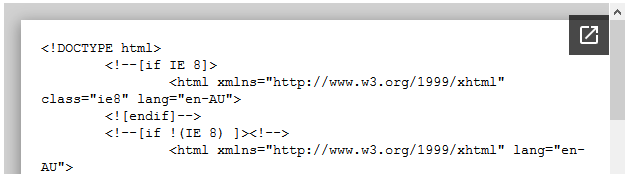
You can’t embed a file uploaded to a private blog using Embed Any Document plugin.
Uploaded file in Embed Any Document on a private blog look something like this:
Your options are:
- Option 1: Change your privacy in Settings > Reading to “Discourage search engines from indexing site but allows normal visitors to view”.
- Option 2: Use Add from URL, Add from Dropbox, Add from Drive or Add from Box to embed using Embed Any Document.
Add from Dropbox, Drive or Box
To add a file directly from Dropbox, Drive or Box you need to first configure these options:
1. Go to Settings > Embed Any Document Plus
2. Add the API key or Client ID and API Key for Dropbox, Drive or Box.
3. Click Save Changes.