The area where you write your post is by default in Visual Editing mode which uses WYSIWYG (What You See Is What You Get) option for formatting.

It works similar to any Word processing software.
Simply write your post (or page), highlight any text you want to format and then click the appropriate icon in the toolbar to add formatting such as bold, italics, number list.
A small tool tip appears describing the icon and its purpose when you hover your mouse over an icon in the visual editor.
Visual Editor Video
There are two rows of icons contained on the visual editor.
The visual editor displays a single row of icons when it is initially opened and you use the Toolbar Toggle icon to view the advanced formatting options contained in the second row. The advanced formatting options include font color, custom characters, undo, redo.

First Row
The visual editor displays the following single row of icons when it is initially opened.

1. Styles: allows you to change the formatting of selected text including heading styles.
2. Bold
3. Italics
4. Bullet points (unordered list)
- Notebook
- Calculator
- Pen/Pencil
- Ruler
5. Ordered list
- Lab work 30 %
- Assignment 30 %
- Exam 40 %
6. Block quote: used to display quote text. Each theme styles block quotes differently.
Insanity: doing the same thing over and over again and expecting different results – Albert Einstein.
7. Align left: used to align text or images left.
8. Align Center: used to center align text or images.
9. Align Right: used to align text or images right.
10. Insert/edit link
11. Unlink
12. Insert More Tag
13. Toolbar toggle: used to enable the second row on your visual editor.
14. Enable Distraction free writing
Second Row
Clicking on the Toolbar Toggle icon reveals the following second row of icons on the visual editor.
1. Strike through
2. Horizontal line
3. Change text color: used to change the color of selected text.
7. Outdent: move text further left
8. Indent: move text further right
9. Undo: undo your last action.
10. Redo: redo your last action.
11. Help: used to display information about using the editor.
Lists
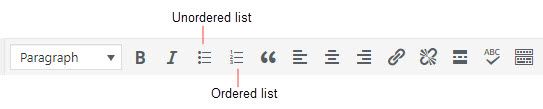
Unordered lists (bullet points) and ordered lists help make your posts easier to read and can make them more visually appealing.
Bullet points (unordered list)
- Notebook
- Calculator
- Pen/Pencil
- Ruler
Ordered list
- Lab work 30 %
- Assignment 30 %
- Exam 40 %
Distraction free writing

When you click on the Distraction free writing icon you’ll see a minimal writing interface with a minimal toolbar, your post title, your post (or page content). Everything works exactly the same as in your visual editor and its purpose is to provide a distraction free writing interface.
The toolbar, word count and borders of the writing area fade away while you are writing and you can access them again by moving your mouse above the post title.
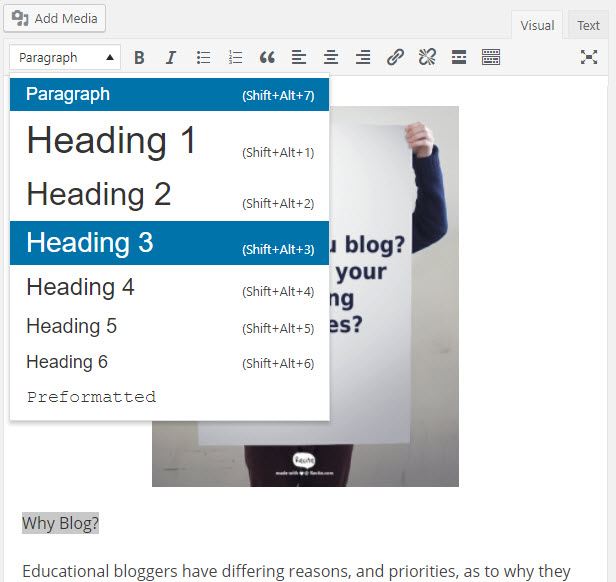
Styles
The style drop down menu allows you to change the formatting of selected text. The most commonly reason why you use the styles drop-down menu is to apply headings to text.
Headings are used to break posts into manageable bite size chunks making it easier to read.
You create styles as follows:
- Highlight the text you want to change into a heading
- Select the Heading Style you want to apply – for most themes your best option is Heading 3
- Preview your post to make sure that headings you used has broken your post into manageable chunks
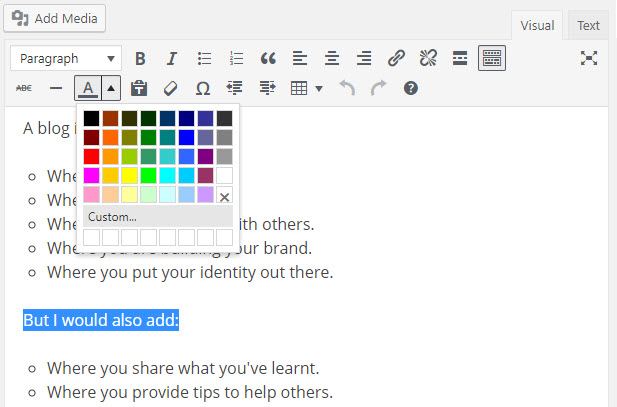
Text Color
You change the color of text as follows:
- Highlight the text you want to change
- Select the text color you want to apply
- Preview your post to make sure the text is readable and you like the color
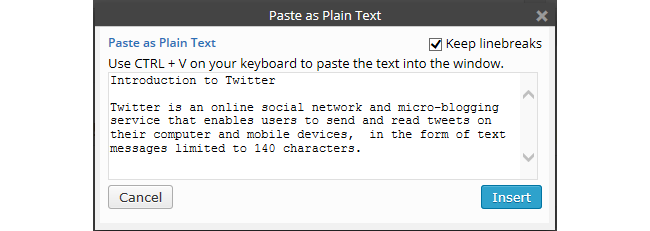
Paste as plain text

You can find when you copy and paste text from another web page or Word Processing software into your visual editor that text might display badly when the post is published. This is because when you copy and paste text from other sources it can paste HTML tags that change how the text is displayed.
One way of preventing this from happening is use the Paste as plain text window to add the copied text. The Paste as Text window applies a special clean up process designed to remove the HTML tags. Select the ‘Keep linebreaks if you want to keep the paragraph formatting.
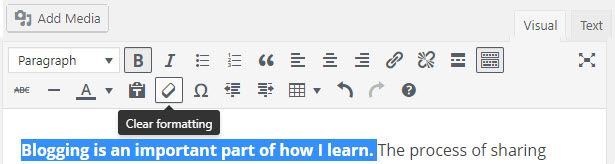
Clear formatting

The remove formatting icon removes all formatting such as bold, italic, color for a highlighted section of text.
You remove formatting from text as follows:
- Highlight the text you want remove the format from
- Click on the Clear Formatting icon.
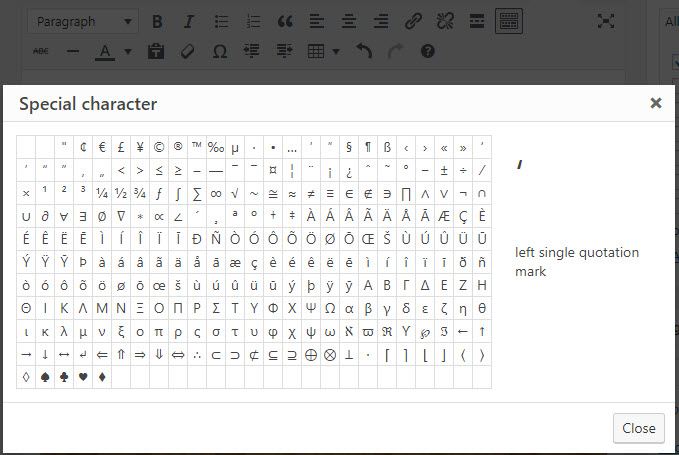
Special character

The insert custom character icon allows you to insert special characters into your post.
You add a special character as follows:
- Place your cursor where you want the special character to appear.
- Click on the Special Character icon.
- Click on the character you want to insert.