The Heading block is used to add headings to your page or post. Headings help structure your page making your content easier to read by humans and search engines.
Here’s what it looks like when it’s added to the Block Editor.

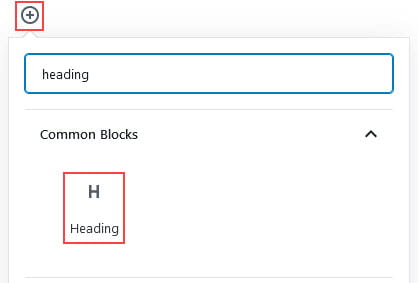
To add a heading block to a page you click on the + icon at the left of any empty block or at the top left of the editor then search for heading and click on the heading icon.
More detailed instructions for adding blocks can be found here.
Add Heading
Once you have added the heading block you type the text you want to appear in your heading.

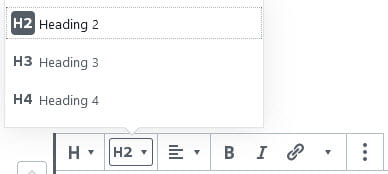
The default heading style is Heading 2 and can be changed to Heading 3 or 4 by clicking on the H2 icon in the block toolbar and selecting the preferred heading style.
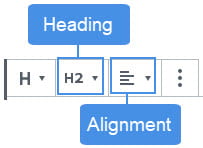
Block Toolbar
You reveal the block’s toolbar by selecting the block. The heading block toolbar has options to change block type and alignment.
The change block type or style icon is used to transform the block to a paragraph block, quote block or group block.
By default the heading block is aligned left. The alignment of the Heading block is changed by clicking on the change alignment icon and selecting the preferred alignment.
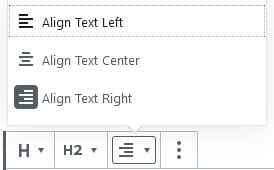
- Align left: used to align file block left.
- Align Center: used to center align file block
- Align Right: used to align right file block.
Block Settings
Additional options for the heading block are located in the editor sidebar of the block editor. Click on the Settings icon next to the Publish/Update button if you don’t see the editor sidebar.
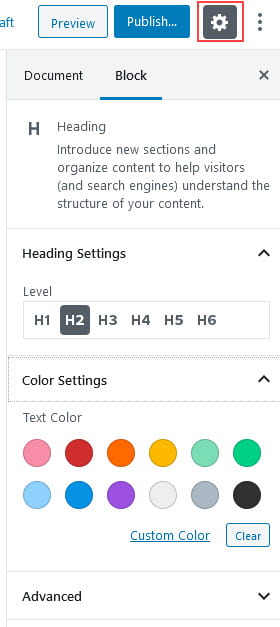
The block settings in the sidebar include H1, H5 and H6 in addition to H2, H3 and H4 that are located in the heading block toolbar.
The text color settings can be used for change the heading color.
The advanced tab lets you add a CSS class to your block allowing you to write custom CSS and style the block.