The Advanced Tables plugin is an advanced solution for creating and managing table. It’s an ideal tool for creating large tables that allows visitors to sort, filter, search data. It supports pagination and scrolling on larger tables. You can also import a range of file formats including Excel spreadsheets to create tables.
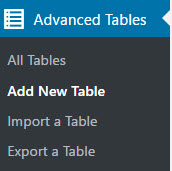
Once the Advanced Tables plugin has been activated in Plugins > All Plugins you’ll see a new Advanced Tables menu added to your main navigation.
Add New Table
You create a new table as follows:
1. Go to Advanced Tables > Add New Table
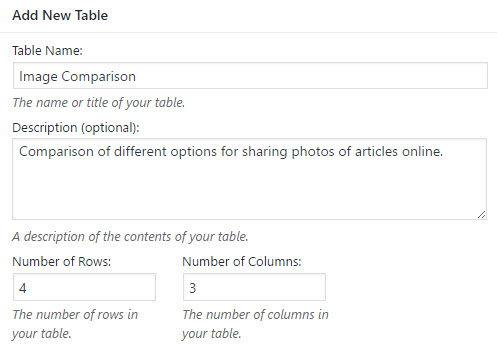
2. Add your table name, description and specify the number of rows and columns.
- Table Name: (choose a name that is descriptive)
- Description (optional): (this might be useful if you have a lot of similar tables)
- The number of table Rows and Columns (this can be edited later)
3. Click Add Table.
4. Add your table content.
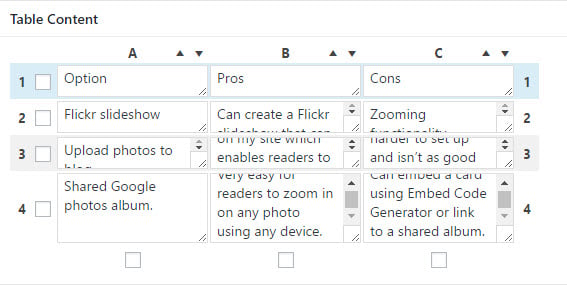
5. Use the table manipulation tools and table options to customize content in your cells and customize the look of your table (we’ve discuss each of these in more details below).
6. Uncheck “Use Datatables” in the Features of the DataTables Javascript library module if you are creating a simple table.
- These features are designed to be used with more complex tables where you wanted to provide visitors with advanced functionality such as the ability to sort and filter table data; or need to enable pagination and scrolling on larger tables.

7. Click Save Changes once you’ve finished creating your table.
The Advanced Editor
Advanced Tables includes an Advanced editor that can be used to add links, images, bold, italics.
To activate the advanced editor you need to:
1. First click on the Advanced Editor icon in Table Manipulation

2. Click in the cell you want to add content to using the Advanced Editor. The Advanced Editor should launch and works the same as the text editor.
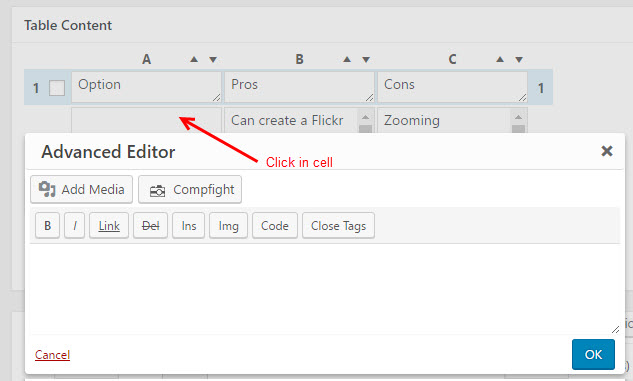
3. Add your text.
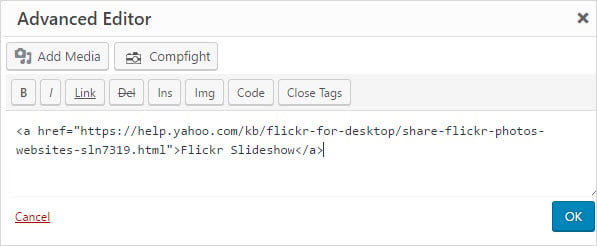
4. Click OK.
Other Table Manipulation Tools
Advanced Tables includes other manipulation tools in addition to the Advanced Editor.
These tools work the same as the Advanced Editor.
Click on the icon of the tool you want to use then click on the cell you want to use the tool in.

Tools are:
- Insert Link – allows you to insert a link into a table.
- Insert Image: opens the Media Library so images can be inserted into a cell.
- Advanced Editor: opens up an Advance Text Editor that also gives you access to Adding Media.
- Hide/Show Rows/Columns: select a row to Show or Hide the Row/Column.
- Duplicate/Insert/Delete Rows/Columns: select a row to Duplicate, Insert or Delete the Row/Column.
- Add Rows/Columns: allows you to add additional Rows or Columns to your Table.
Table Options
Table options are used to customize the look of your table.

- Table Head Row: allows you to set the first Row of your table as a Column Headers.
- Table Foot Row: turns the last Row of your table into a footer area.
- Alternating Row Colors: changes the colors of alternating rows.
- Row Over Highlighting: highlights a Row when the mouse hovers over a Row.
- Print Table Name: shows the table name. This name can be placed above or below the table
- Print Table Description: shows the table description either above or below the table.
Features of the DataTables Javascript library
On small tables you would uncheck “Use Datatables” as your visitors won’t need the advanced functionality provided by these features.

DataTables Javascript library is designed to be used with more complex tables where you wanted to provide visitors with advanced functionality such as the ability to sort and filter table data. It also allows you to enable pagination and scrolling on larger tables.
Features of DataTables Javascript library enables you to:
- Sorting: allows your site visitors to sort columns in your table.
- Search/Filtering: is useful for very large tables with lots of data.
- Pagination Length Change: allows site visitors to change the number of Rows that shown when pagination is active.
- info: displays additional table information.
- Horizontal Scrolling: allows large tables to be horizontally scrolled.
- Custom Commands: additional information can be found at www.datatables.net.
Add Table to Post or Page
You add your new table to a post or page as follows:
1. Go to Posts > Add New or Pages > Add New.

2. Place your cursor where you want to insert the table to appear and click on the Insert Advanced Table icon.

If you are using the block editor you need to add a classic block and then click on the Insert Advanced Table icon or add a Shortcode block and paste the shortcode into the block.
3. The Advanced Table Window will launch.
4. Click on the Insert Shortcode next to the Table you want to insert.
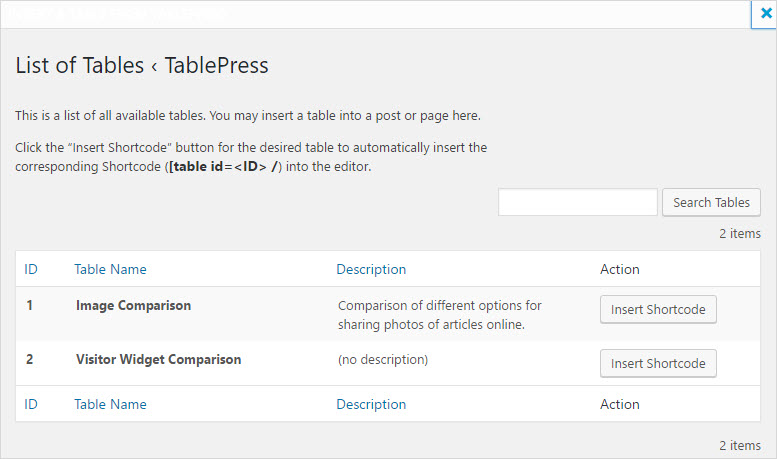
5. The Advanced Tables shortcode will be inserted into your post.

6. When you view your published post or page you’ll see your new table.
Import a Table
You can import tables from existing data, like from a csv, xls, or xlxs file from a spreadsheet application, an HTML file resembling a webpage, or its own JSON format into Advanced Tables.
You import a table from an Excel spreadsheet as follows:
1. Go to Advanced Tables > Import a Table
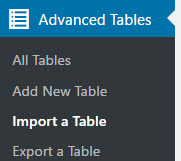
2. Select File Upload and click on Choose File to select the file you want to upload.
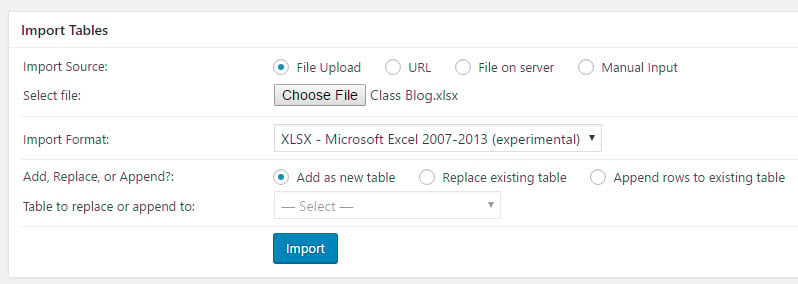
3. Select the Import Format XLSX – Microsoft Excel 2007-2013 (if it is an xlsx file).
4. Select Add as new table.
5. Click Import.
6. After the file has uploaded it will load in the Add New Table screen where you check the table contents and customize the settings.
7. Click Save Changes.
You can also export a Table using Advanced Tables > Export and import into into a new site using Advanced Tables > Import a Table.
Manage Tables
Tables are managed in Advanced Tables > All Tables. This is the area in your admin panel where you see a a listing of all saved tables.
Hovering your mouse over the title of a table brings up 6 action links:

- Edit: Click on Edit to open up the table in full edit mode to make changes to the Table.
- Show Shortcode: Displays the shortcode that is used to add a table to a post or page.
- Copy: Creates a copy of your table. Ideal for situations where you want to use the table, with modifications, for another use.
- Export: Loads TablePress > Export where you can download a copy of your table.
- Delete: Used to delete a table.
- Preview: Loads a preview of the table as an overlay on the TablePress > All Tables screen. The preview doesn’t apply your theme’s CSS or load Datatable Javascript set features i.e. the table will look different when viewed in a post or page.
Responsive Tables
The Responsive Tables plugin by Tablepress is part of Advanced Tables and does not need to be activated separately.
Tables do not always adjust automatically to the available screen space. This can occur when the minimum table width is larger than the available content area width. On smaller screens such as phones and tablets, parts of the table might be cut off.
Four Approaches for Responsiveness
There are four approaches to applying responsive tables, namely Flip, Scroll, Collapse, and Stack.
Flip – this mode changes the layout of your table by flipping it on its side, making it horizontally scrollable. This works well for plain data/text tables, although not as effective in tables with images.
Scroll – the table is not flipped on its side in this mode, instead, the table can be scrolled horizontally to access otherwise cut-off data. This works well with tables that include images that don’t automatically resize.
Collapse – data that would otherwise be cut off can be shown/hidden with a ‘+’ or ‘-‘ button in each row by adding a collapsable row inserted below each entry.
Stack – table rows are displayed in a single column by stacking cells of a row on top of each other instead of next to each other. Ideally, the text data should be easily recognizable since the column header cells from the table header row will not be visible.
Sorting, filtering, and pagination will continue to work in the first three of these modes.
Shortcodes
To use these modes with your tables, you would add the following parameters to your table’s Shortcode.
For example, to add the ‘flip’ mode to a table, you would adjust the table’s shortcode from something like this:
[table “123” not found /]
to
[table “123” not found /]
The same can be applied with scroll, collapse, or stack modes.
Define Screen Size
The flip and stack modes can be further customized by adding another parameter to define which screen size the mode should be used on (note that this does not apply to scroll and collapse modes).
By adding the parameter: responsive_breakpoint using either phone, tablet, desktop, and all as possible values, this sets the biggest screen size on which flip or stack mode will be used according to the following list:
- phone: The flip or stack mode is used only on phones (devices with a screen width smaller than 768 pixels)
- tablet: The flip or stack mode is used on phones and tablets (devices with a screen width smaller than 980 pixels)
- desktop: The flip or stack mode is used on phones, tablets, and medium-sized desktop monitors (devices with a screen width smaller than 1200 pixels)
- all: The flip or stack mode is used on all screens, regardless of their screen size
For example, this is what your customized shortcode would look like by adding the parameter: responsive_breakpoint=”phone” to the flip mode shortcode and applying the phone value:
[table “123” not found /]
Here is the same parameter added to the stack mode shortcode:
[table “123” not found /]
In each of these examples, the value phone can be replaced with tablet, desktop, or all as possible values.
Troubleshooting
If search or pagination doesn’t work, or the table isn’t displaying correctly, it can mean bad HTML has been added to the page.
You troubleshoot the problem as follows:
- Export the table to HTML.
- Use https://validator.w3.org/ to validate broken elements.
- Repair the broken elements.
- Import the table with the fixed HTML.