Tiled Galleries
By default, image galleries are inserted as a thumbnail grid style.
You can extend the types of image galleries you insert into posts and pages to include tiled mosaic, square mosaic or circular grid using the Tiled Galleries module in the Jetpack plugin.
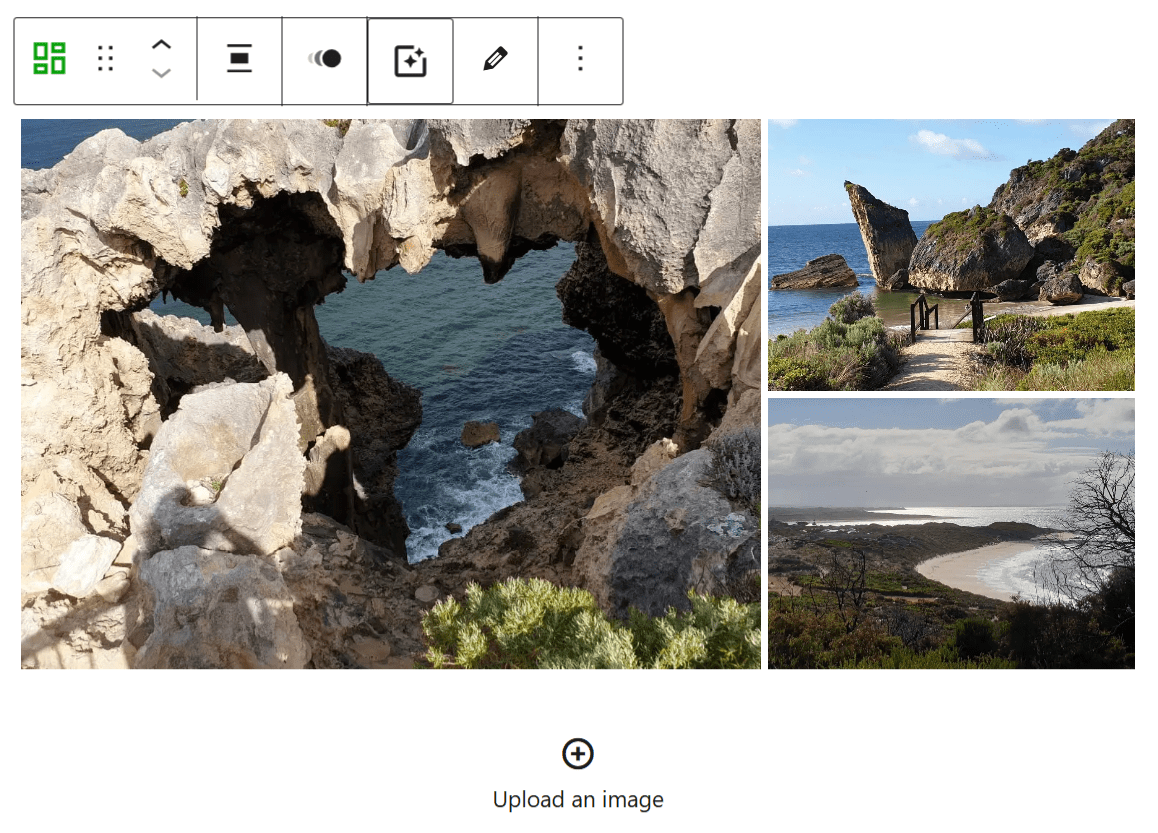
Here are examples of each:


Please note:
You must be using either “Allow search engines to index this site” or “Discourage search engines from indexing this site” in Settings > Reading to use Tiled Galleries. You can’t use Tiled Galleries if your blog is using one of the private options in Settings > Reading.
How you use tiled galleries depends on if you are using the block editor or the classic editor.
Block Editor
The following section explains how to add a tiled gallery using the block editor. If you are using the classic editor, refer to how to add a tiled gallery using classic editor section.
A Tiled Gallery block is automatically added to your block editor when the Jetpack plugin is set up on your site.
1. Place your cursor where you want the tiled gallery to be embedded and add a tile gallery block.

2. Click on Upload or Select Images.

- Upload – used for uploading images from your computer.
- Select images:
- Media Library – select images you already have in your media library.
- Google Photos – allows you to connect to your Google Photos account and select photos from your Google Photos account.
- Pexels Free Photos – allows you to access over 40,000 copyright free images from Pexels Free photo library.
3. Use Ctrl key to select more than one image and then click Select. The selected images are inserted into your tiled gallery where you can preview in your block editor.
You can add more images to the slideshow from your computer by clicking on Upload an image.
4. Click on Edit in the block toolbar to rearrange the images and add/edit captions.

5. The Filter options in the block toolbar allows you to apply a filter to your tile gallery. Options are: original, black and white, sepia, 1977, Clarendon and Gingham

6. You can customize the tiled gallery using the editor sidebar.
If you don’t see the editor sidebar, click on the cog next to Publish/Update button.

Options include:
- Styles: Tiled mosaic, circles, square tiles, tiled columns
- Rounded corners
- Link to: None, Media File or Attachment page.

Classic Editor
The following section explains how to add a tiled gallery using the classic editor. If you are using the block editor, refer to add a tiled gallery using block editor section.
Activate Tiled Gallery
Once you’ve activated the Jetpack plugin you activate the carousel model as follows:
Activating the carousel model automatically activates the tiled gallery model in the classic editor at the same time.
1. Go to Jetpack > Settings

2. Click on the Writing tab.

3. Scroll down to Media module and toggle on the switch next to “Display images in a full screen carousel gallery“.
On this page you can also choose to show or hide the comments area in the image lightbox, set a black or white background for the carousel and choose to display the photo metadata (Exif) in the Carousel if it’s available.

Add Tiled Gallery
Once you’ve activated the Tile Galleries module it adds a Type option to your Gallery Settings and you just need to select the Gallery type you want to insert when adding an image gallery to your post.

Here’s how to add a tiled gallery:
1. Go to Posts > Add New.

2. Place your cursor in your post/page editor where you want the tiled gallery to appear.
3. Click on the Add Media icon.

4. In the Add Media window click on the Create Gallery and then Select Files.

5. Locate the images on your hard drive using your Shift or Crtl key to select more than one image then click Open.
6. While your images are uploading you will see a progress bar.
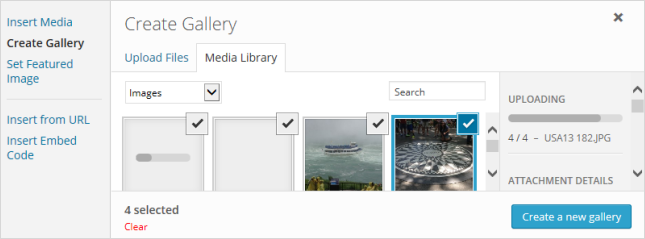
7. Once uploaded click on Create a new Gallery.
8. This takes you to the Edit Gallery window.
9. Click on each image to edit its title. caption, alternative text and description under Attachment details.
- Title: The title displays on the image attachment page.
- Caption: Image caption displayed directly below the image.
- Alt Text: The text displayed when image is not available.
You can change the order of photos by choosing Reverse order or using Random order. Alternatively, you can reorder photos by clicking on the photo and then dragging them to a new location.
10. Choose how you want the gallery to be displayed in the Gallery Settings area.
- You selected Tile gallery type using the Type option.
- Link to:
- Attachment page: links the thumbnail image to a page set up specifically to display the image with all image details. Appearance of the attachment page varies depending on your theme.
- Media file: Links to the thumbnail image directly to the full size uploaded image.
- Random Order: select this option if you want the image order to change each time the page loads.
- Type:
- Thumbnail Grid – default gallery of thumbnail images
- Tiled Mosaic – gallery with rectangular tiles
- Squared Tiles – gallery with square tiles
- Circles – gallery with circular tiles
- Tile Columns
11. Click Insert Gallery.
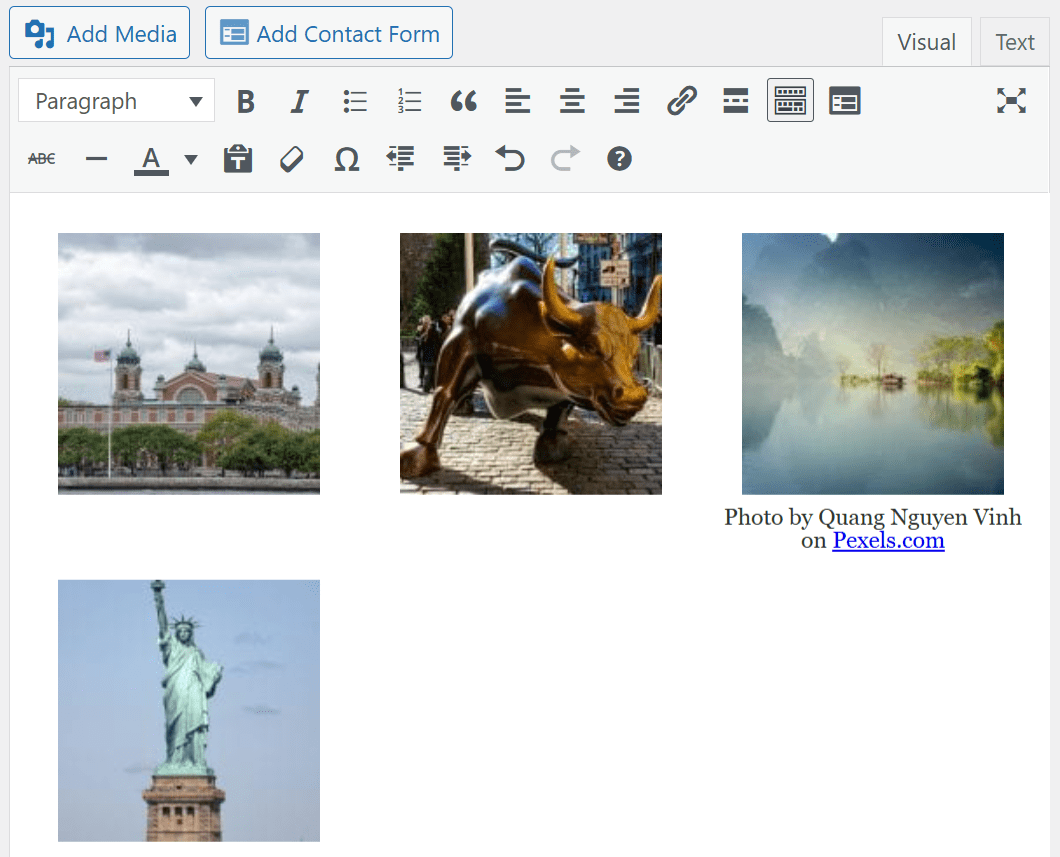
12. Your Add Media window will close and your image gallery will appear in your post/page editor as shown below.
13. When you view your post you’ll see your gallery displayed.


Tiled Galleries Option
You can change your default gallery option from thumbnail Grid, gallery of thumbnail image, to a tiled mosaic gallery, gallery with rectangular tiles, by selecting “Display all your gallery pictures in a cool mosaic” in Settings > Media.

Choosing this option makes this the default layout for all image galleries including those you’ve already inserted. This means if you’ve previously inserted the default image gallery it will now display as a tiled mosaic gallery instead of a thumbnail grid gallery.